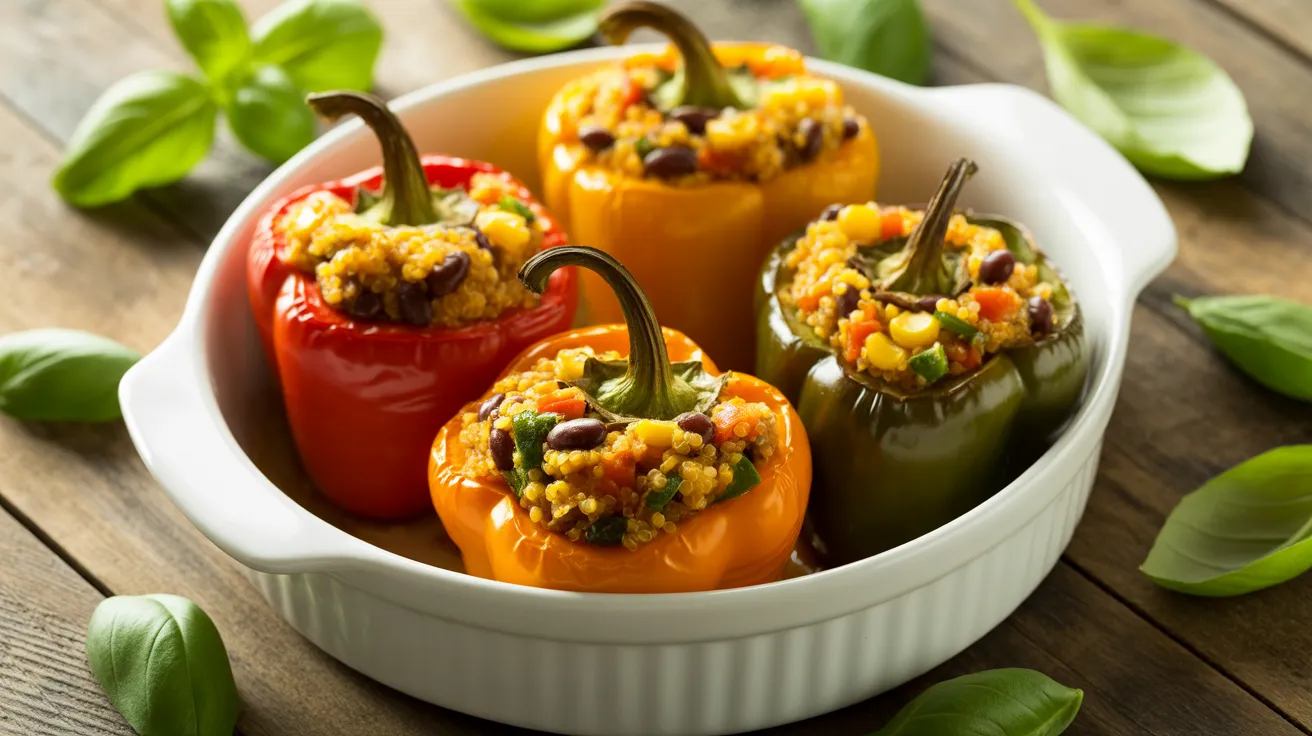
These vibrant vegan stuffed peppers transform ordinary bell peppers into an extraordinary plant-based meal that’s both satisfying and nutritious. Our foolproof vegan stuffed peppers recipe guides beginners through every step to create restaurant-quality results with a protein-packed quinoa filling that even meat-eaters will love.
SERVES: 4 | PREP: 20 MIN | COOK: 25 MIN | TOTAL: 45 MIN
Ingredients for Perfect Vegan Stuffed Peppers
For the Peppers
| Ingredient | Amount |
|---|---|
| Large bell peppers (any color) | 4 whole |
| Olive oil | 1 tablespoon |
For the Filling
| Ingredient | Amount |
|---|---|
| Quinoa, uncooked | 1 cup |
| Vegetable broth | 2 cups |
| Yellow onion, diced | 1 medium |
| Garlic cloves, minced | 3 cloves |
| Zucchini, diced | 1 medium |
| Cherry tomatoes, halved | 1 cup |
| Black beans, drained | 1 can (15 oz) |
| Corn kernels | ½ cup |
| Nutritional yeast | 3 tablespoons |
| Smoked paprika | 1 teaspoon |
| Cumin | 1 teaspoon |
| Salt | ½ teaspoon |
| Black pepper | ¼ teaspoon |
| Fresh basil, chopped | 2 tablespoons |
Complete Step-by-Step Instructions for Vegan Stuffed Peppers
Phase 1: Preparing Your Bell Peppers (10 minutes)
Step 1: Preheat and Position Your Oven Set your oven to 375°F (190°C) and position the rack in the center. This temperature is crucial – higher heat will char the outside before the inside cooks, while lower heat won’t create the perfect tender texture. Allow 10-15 minutes for proper preheating while you prep.
Step 2: Select and Examine Your Peppers Choose bell peppers that are firm, glossy, and roughly the same size for even cooking. Look for peppers without soft spots, wrinkles, or dark patches. Size matters: peppers should be large enough to hold about ¾ cup of filling comfortably.
Step 3: Create the Perfect Pepper Cups Using a sharp knife, cut ½ inch straight across the top of each pepper. Don’t angle the cut – keep it perfectly horizontal. The tops should come off cleanly, revealing the seed cavity inside. Save those tops – you can dice the usable parts for extra filling!
Step 4: Clean Out the Interior Completely Reach inside each pepper and pull out the entire seed cluster – it should come out in one piece if you grab it firmly. Use a small spoon to scrape away any remaining seeds and all white membranes (called ribs). These white parts are bitter and tough, so remove every bit you can see.
Step 5: Create Stable Standing Peppers Turn each pepper upside down on your cutting board. If any pepper wobbles or tips over, use your knife to carefully slice off just a thin layer from the bottom. Critical warning: Cut only enough to create stability – if you slice through to the inside cavity, the filling will leak out during cooking.
Step 6: Oil for Flavor and Prevention Pour olive oil into a small bowl. Using a pastry brush or your fingers, coat the entire outside surface and inside cavity of each pepper. This prevents sticking, adds flavor, and helps achieve beautiful golden color. Don’t skip the inside – it makes a huge difference in taste.
Phase 2: Creating the Perfect Quinoa Base (15 minutes)
Step 7: The Critical Quinoa Rinse Place quinoa in a fine-mesh strainer and rinse under cold running water for 2-3 minutes. Rub the grains between your fingers while rinsing. You’ll see the water start cloudy and gradually run clear – this removes saponin, a natural coating that tastes bitter and soapy. This step is non-negotiable for great-tasting vegan stuffed peppers.
Step 8: Heat Your Cooking Liquid Pour vegetable broth into a medium saucepan and bring to a rolling boil over high heat. You’ll see large bubbles breaking the surface vigorously. Using broth instead of water adds tremendous flavor depth to your quinoa base.
Step 9: Add Quinoa and Establish Simmer Add the rinsed quinoa to the boiling broth. The liquid will stop boiling temporarily – that’s normal. Stir once to prevent sticking, then immediately reduce heat to low and cover with a tight-fitting lid. You want gentle bubbling, not violent boiling.
Step 10: Time the Cooking Precisely Set a timer for exactly 15 minutes. During this time, do not lift the lid – you’ll release essential steam. You should hear very gentle bubbling. If it’s too quiet, increase heat slightly. If it’s bubbling vigorously, reduce heat further.
Step 11: Test for Doneness After 15 minutes, remove from heat but keep covered. Let stand exactly 5 minutes – this finishing time allows remaining liquid to absorb completely. Remove the lid and look for these signs of perfect quinoa: individual grains with tiny white rings visible, fluffy texture, and no excess liquid.
Step 12: Fluff for Perfect Texture Use a fork to gently fluff the quinoa, starting from the edges and working toward the center. Properly cooked quinoa should be light, fluffy, and never mushy. If you see excess liquid, return to low heat uncovered for 2-3 minutes, stirring occasionally.
Phase 3: Building the Flavorful Filling (12 minutes)
Step 13: Heat Your Cooking Surface Place a large skillet over medium heat for 1-2 minutes until evenly heated. Test readiness by sprinkling a few drops of water – they should sizzle and evaporate quickly but not violently. This temperature prevents burning while allowing proper browning.
Step 14: Cook the Aromatic Base Add diced onion to the heated skillet (no oil needed yet – onions release moisture). Cook for 3-4 minutes, stirring every 30 seconds. Look for these changes: onions become translucent, edges start to soften, and they smell sweet rather than sharp. This creates the flavor foundation for your vegan stuffed peppers.
Step 15: Add Garlic at the Right Moment Add minced garlic to the softened onions and stir immediately. Cook for 30-45 seconds only – you’ll smell the garlic become fragrant almost instantly. Critical timing: garlic burns quickly and becomes bitter, so watch carefully and stir constantly during this short window.
Step 16: Incorporate the Vegetables Strategically Add diced zucchini to the pan and stir to combine with the onion-garlic mixture. Cook for 2-3 minutes, stirring every 45 seconds. The zucchini should soften slightly but still hold its shape – you want it tender-crisp, not mushy. Overcooked zucchini releases too much water and makes soggy filling.
Step 17: Add the Finishing Vegetables Stir in halved cherry tomatoes, drained black beans, and corn kernels. Cook for 2-3 minutes, stirring gently every minute. The tomatoes will start to release their juices and soften slightly, the beans will heat through, and the corn will become bright and tender.
Step 18: Create the Final Flavor Profile Remove the skillet from heat – residual heat will finish the cooking. Add the cooked quinoa, nutritional yeast, smoked paprika, cumin, salt, and black pepper. Stir thoroughly to distribute all seasonings evenly. Taste test now – the filling should be well-seasoned and flavorful on its own.
Phase 4: Assembly and Baking Your Vegan Stuffed Peppers (25 minutes)
Step 19: Prepare Your Baking Environment Select a baking dish large enough to hold all 4 peppers without crowding – a 9×13 inch dish works perfectly. Pour ¼ cup of water into the bottom of the dish. This creates steam during cooking, which keeps the peppers moist and helps them cook evenly.
Step 20: Fill Each Pepper Strategically Divide the filling evenly among the 4 peppers – each should get about ¾ cup of filling. Use a large spoon to fill each pepper, packing gently but not tightly. Leave about ¼ inch of space at the top – the filling expands slightly during cooking. Overpacking creates dense, heavy results.
Step 21: Position for Even Cooking Place filled peppers in the prepared baking dish, ensuring they don’t touch each other. If a pepper tips over, nestle it against the side of the dish for support. The water should surround the bases without coming up the sides of the peppers.
Step 22: Create the Steam Environment Cover the entire dish tightly with aluminum foil, crimping the edges to seal completely. This traps steam, which gently cooks the peppers while keeping them moist. No steam should escape during the covered cooking phase.
Step 23: First Baking Phase Place in the preheated oven and bake covered for exactly 20 minutes. Don’t open the oven door during this time – you’ll lose valuable steam. The peppers should be getting tender while the filling heats through completely.
Step 24: Final Browning Phase Remove the foil carefully – hot steam will escape, so keep your face away from the dish. Return to the oven uncovered for 5-7 minutes. This final phase allows the tops to lightly brown and any excess moisture to evaporate.
Step 25: Test for Perfect Doneness Insert a fork into the thickest part of a pepper wall – it should slide in easily with just slight resistance. The pepper should hold its shape but yield to gentle pressure. If still firm, return to oven for 2-3 more minutes and test again.
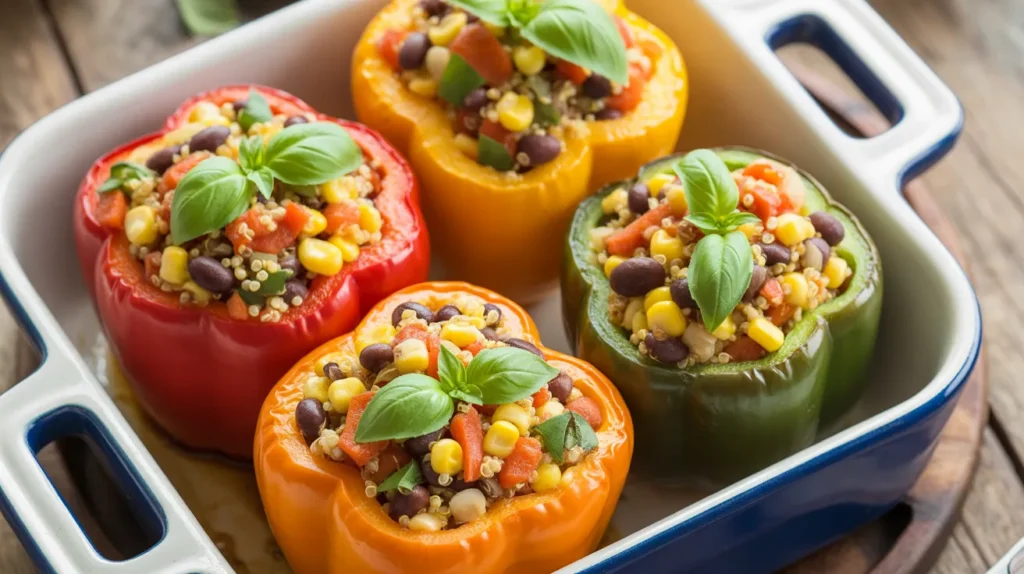
Step 26: Rest and Garnish Remove from oven and let rest for 5 minutes before serving. This allows the filling to set slightly and makes serving easier. Sprinkle with fresh chopped basil just before serving for bright color and fresh flavor.
Chef’s Notes for Perfect Vegan Stuffed Peppers
Pepper Color Choice: Red, yellow, and orange peppers are naturally sweeter and more tender than green peppers, making them ideal for vegan stuffed peppers. Green peppers have a more assertive flavor and firmer texture.
Quinoa Success: The key to fluffy quinoa is the proper liquid ratio and cooking time. Too much liquid creates mushy quinoa, while too little leaves hard, undercooked grains that ruin the texture of your vegan stuffed peppers.
Make-Ahead Strategy: Assemble these vegan stuffed peppers up to 24 hours ahead and refrigerate covered. Add 5 extra minutes to the covered baking time when cooking from cold.
Flavor Enhancement: For deeper taste, sauté the vegetables in 1 tablespoon of olive oil instead of cooking them dry. This adds richness and helps develop more complex flavors in your filling.
Nutrition Information (Per Serving)
- Calories: 285
- Protein: 12g
- Carbohydrates: 52g
- Fat: 6g
- Fiber: 10g
- Iron: 15% DV
Creative Vegan Stuffed Peppers Variations
Mediterranean Vegan Stuffed Peppers: Replace black beans with chickpeas and add sun-dried tomatoes, kalamata olives, and fresh oregano for a Greek-inspired twist that pairs beautifully with our vegan soup.
Mexican-Style Filling: Use brown rice instead of quinoa, add diced jalapeños, cilantro, and a squeeze of lime juice for zesty vegan stuffed peppers with south-of-the-border flair.
Protein-Packed Version: Stir in ½ cup of crumbled firm tofu or your favorite plant-based ground meat substitute for extra protein in these hearty vegan stuffed peppers.
Autumn Harvest Style: Substitute diced sweet potato for zucchini and add dried cranberries and chopped walnuts for seasonal vegan stuffed peppers that celebrate fall flavors.
Storage & Reheating Your Vegan Stuffed Peppers
Refrigerator Storage: Store leftover vegan stuffed peppers covered in the refrigerator for up to 4 days. The flavors actually develop and improve overnight, making day-two peppers even more delicious.
Freezer Storage: Wrap individual cooled peppers in plastic wrap, then aluminum foil. Label with the date and freeze for up to 3 months. Properly wrapped vegan stuffed peppers maintain their quality throughout the freezing period.
Reheating from Refrigerator: Microwave on 50% power for 2-3 minutes, or reheat in a 350°F oven for 15 minutes until heated through to the center.
Reheating from Frozen: Thaw overnight in the refrigerator, then reheat using the methods above. Never attempt to cook frozen vegan stuffed peppers – they’ll cook unevenly.
Troubleshooting Common Vegan Stuffed Peppers Problems
Problem: Peppers are too soft and collapsing. Solution: Reduce total baking time by 5 minutes. Check doneness by inserting a fork – peppers should be tender but still hold their shape firmly.
Problem: Filling is dry and lacks moisture. Solution: Add 2-3 tablespoons of vegetable broth or tomato sauce to the filling mixture before stuffing the peppers.
Problem: Pepper skins are browning too quickly. Solution: Cover with foil for the entire baking time, removing only for the final 3-5 minutes to prevent over-browning.
Problem: Quinoa in filling is mushy and overcooked. Solution: Reduce cooking liquid to 1¾ cups broth next time, and ensure you’re fluffing with a fork rather than stirring vigorously.
Problem: Vegan stuffed peppers lack overall flavor. Solution: Always taste and season the filling before stuffing. Increase salt, nutritional yeast, or herbs until the mixture tastes delicious on its own.
Essential Equipment for Vegan Stuffed Peppers
- 9×13 inch baking dish (glass or ceramic preferred)
- Medium saucepan with tight-fitting lid (for quinoa)
- Large skillet (for sautéing vegetables)
- Sharp chef’s knife (for precise pepper cutting)
- Large cutting board (for safe prep work)
- Fine-mesh strainer (essential for rinsing quinoa)
- Measuring cups and spoons (for accurate proportions)
- Heavy-duty aluminum foil (for proper steaming)
Complete Shopping List for Vegan Stuffed Peppers
Produce Section
- 4 large bell peppers (choose your favorite colors)
- 1 large yellow onion
- 1 head fresh garlic
- 1 medium zucchini
- 1 container cherry tomatoes
- Fresh basil bunch
Pantry Aisle
- 1 bag quinoa
- 1 can black beans (15 oz)
- 1 bag frozen corn or 1 can corn
- Nutritional yeast
- Smoked paprika
- Ground cumin
- Extra virgin olive oil
Refrigerated Section
- 32 oz container vegetable broth
Five Success Secrets for Perfect Vegan Stuffed Peppers
1. Master the quinoa rinse technique – this single step prevents bitter, soapy flavors that can completely ruin your vegan stuffed peppers. Rinse until the water runs completely clear.
2. Never skip the 5-minute rest period for cooked quinoa. This finishing time allows the grains to absorb remaining moisture and achieve the perfect fluffy texture that makes superior vegan stuffed peppers.
3. Always add water to your baking dish – this creates gentle steam that cooks the peppers evenly while preventing them from drying out or becoming tough.
4. Taste your filling mixture before stuffing – it should be well-seasoned and delicious on its own since the mild bell peppers won’t add much flavor to the final dish.
5. Allow finished vegan stuffed peppers to rest for 5 minutes before serving. This helps the filling set up properly and makes them much easier to slice and serve attractively.
Complete your plant-based meal by serving these alongside our fresh vegan sushi for an impressive dinner that showcases the incredible variety and satisfaction of vegan cooking.