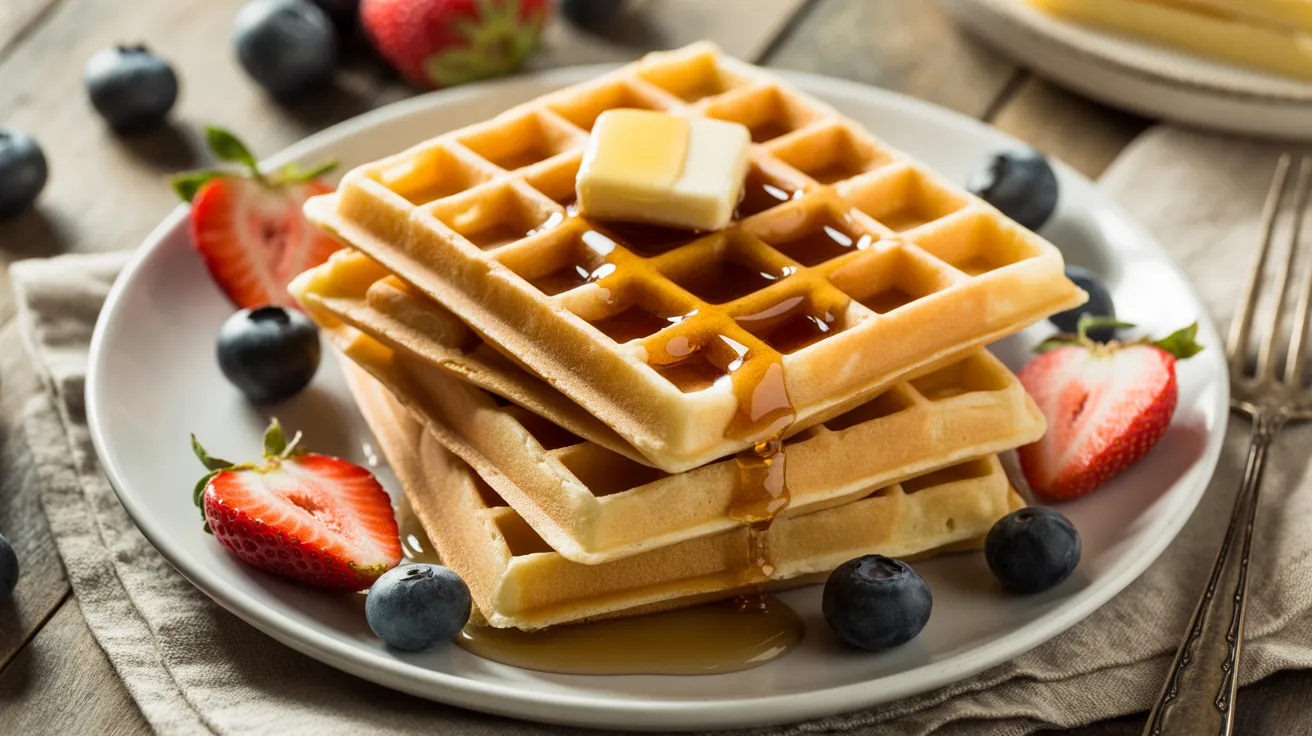
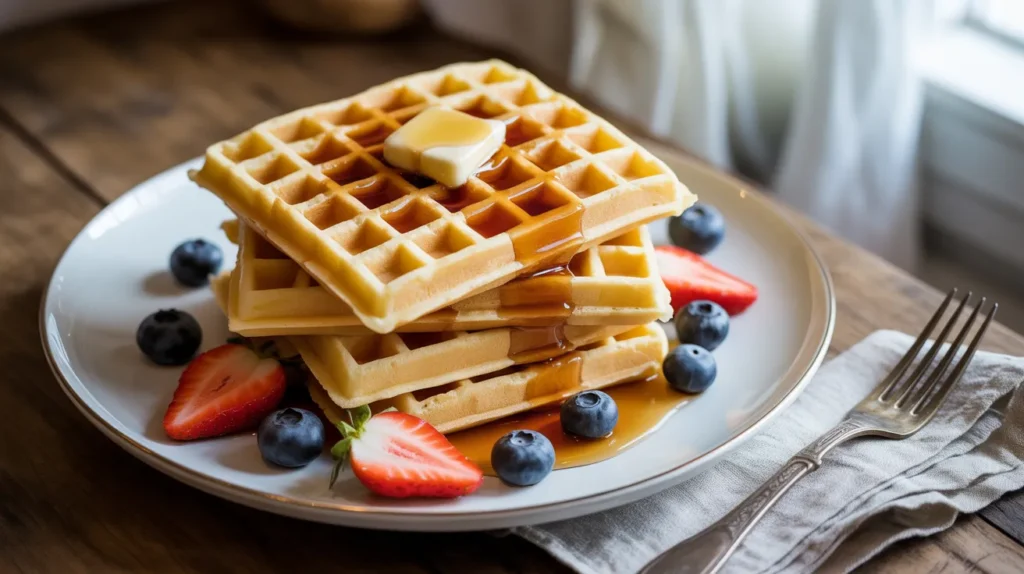
These incredible vegan waffles will transform your breakfast routine with their golden, crispy exterior and impossibly fluffy interior. Using everyday plant-based ingredients, these vegan waffles prove that dairy-free doesn’t mean flavor-free – they’re so delicious, nobody will guess they’re completely vegan.
SERVES: 4 | PREP: 15 MIN | COOK: 20 MIN | TOTAL: 35 MIN
Ingredients for Perfect Vegan Waffles
Dry Ingredients
| Ingredient | Amount | Purpose |
|---|---|---|
| All-purpose flour | 2 cups | Creates structure |
| Baking powder | 2 teaspoons | Provides lift and fluffiness |
| Sugar | 2 tablespoons | Adds sweetness and helps browning |
| Salt | 1/2 teaspoon | Enhances all flavors |
| Cinnamon | 1/2 teaspoon | Adds warmth and depth |
Wet Ingredients
| Ingredient | Amount | Purpose |
|---|---|---|
| Non-dairy milk (oat or almond) | 1¾ cups | Main liquid base |
| Vegetable oil | 1/3 cup | Creates tender texture |
| Vanilla extract | 2 teaspoons | Adds flavor complexity |
| Apple cider vinegar | 1 tablespoon | Creates vegan “buttermilk” |
Detailed Step-by-Step Instructions for Vegan Waffles
Phase 1: Equipment Setup and Preparation (8 minutes)
Step 1: Preheat Your Waffle Iron Start by plugging in your waffle iron and setting it to medium-high heat. Most waffle makers have indicator lights – wait until the “ready” light turns on. This usually takes 5-8 minutes. While waiting, you can prepare your ingredients.
Beginner Tip: Every waffle iron is different. If this is your first time using yours, check the manual for specific temperature settings.
Step 2: Gather All Ingredients Place all ingredients on your counter in the order you’ll use them. This cooking technique, called “mise en place,” prevents mistakes and makes cooking smoother. Measure everything before you start mixing.
Why This Matters: Having everything ready means you won’t accidentally forget an ingredient or let your batter sit too long.
Step 3: Prepare Your Workspace Set out two large mixing bowls, measuring cups, a whisk, and a wooden spoon. Place a wire cooling rack near your waffle iron if you have one. If not, use a large plate.
Phase 2: Creating the Dry Mixture (3 minutes)
Step 4: Combine All Dry Ingredients In your larger mixing bowl, add the 2 cups flour first. Then add 2 teaspoons baking powder, 2 tablespoons sugar, 1/2 teaspoon salt, and 1/2 teaspoon cinnamon.
Important: Always add baking powder to flour first to ensure even distribution.
Step 5: Whisk Dry Ingredients Thoroughly Using your whisk, stir the dry ingredients for 30-45 seconds until everything is completely combined. Look for an even color throughout – no streaks of cinnamon or white flour patches.
Beginner Note: This step is crucial for evenly flavored vegan waffles. Take your time here.
Step 6: Create a Well Push the dry mixture toward the edges of the bowl, creating a hollow space (well) in the center. This well should be about 4 inches wide and deep enough to hold your wet ingredients.
Why Make a Well: This prevents overmixing by giving you a space to add liquids gradually.
Phase 3: Preparing the Wet Mixture (4 minutes)
Step 7: Create Vegan Buttermilk In your second bowl, pour 1¾ cups non-dairy milk. Add 1 tablespoon apple cider vinegar directly to the milk. Stir once and let it sit for 2-3 minutes.
What to Expect: The mixture will look slightly curdled or thickened. This is perfect – you’ve created a vegan buttermilk substitute that makes vegan waffles extra tender.
Step 8: Add Oil and Vanilla After the milk has curdled, add 1/3 cup vegetable oil and 2 teaspoons vanilla extract to the same bowl. Whisk these wet ingredients together for 20-30 seconds until well combined.
Oil Temperature Tip: Room temperature oil mixes better than cold oil straight from the refrigerator.
Phase 4: Combining and Creating Batter (2 minutes)
Step 9: Pour Wet into Dry Slowly pour the wet ingredient mixture into the well you created in the dry ingredients. Pour steadily but not too fast – this should take about 10-15 seconds.
Pouring Technique: Aim for the center of the well to prevent flour from flying everywhere.
Step 10: Mix Gently and Minimally Using a wooden spoon (not the whisk), gently stir the mixture. Start from the center and work outward in circular motions. Stop mixing as soon as you can’t see dry flour – this should take only 15-20 stirs.
Critical Beginner Warning: Your batter should look lumpy with small flour pockets. This is perfect! Smooth batter means overmixed, tough vegan waffles.
Step 11: Let Batter Rest Set the bowl aside for 2-3 minutes. During this time, the flour will fully hydrate, and any remaining lumps will disappear naturally.
Science Behind Resting: This brief rest creates fluffier vegan waffles by allowing the ingredients to fully combine without additional mixing.
Phase 5: Cooking Your Vegan Waffles (15 minutes)
Step 12: Test Iron Temperature Sprinkle 3-4 drops of water onto your waffle iron surface. The water should sizzle immediately and evaporate within 2-3 seconds. If it takes longer, wait another minute.
Temperature Signs: Perfect heat = immediate sizzle. Too hot = water bounces and evaporates instantly. Too cool = water just sits there.
Step 13: Grease the Waffle Iron Spray both the top and bottom plates with cooking spray, or use a pastry brush to apply a thin layer of oil. Even non-stick surfaces need this step for the first waffle.
Greasing Tip: Don’t overdo it – too much oil creates soggy spots on your vegan waffles.
Step 14: Measure and Pour Batter Use a measuring cup to scoop 1/2 to 3/4 cup of batter (depending on your iron’s size). Pour it into the center of the bottom plate, letting it spread naturally.
Batter Amount Guide: The batter should reach about 3/4 of the way to the edges when you close the iron. Start with less – you can always add more next time.
Step 15: Close and Time Your Cooking Close the waffle iron lid gently but firmly. Set a timer for 4 minutes for your first waffle. You’ll adjust timing for subsequent waffles based on browning.
Visual Cues to Watch: Steam will pour out of the sides initially, then gradually decrease. When steam stops completely, your waffle is likely done.
Step 16: Check for Doneness After 4 minutes, carefully lift the lid slightly to peek. The waffle should be golden brown and release easily from the plates. If it sticks or looks pale, close and cook for 30-60 seconds more.
Perfect Waffle Signs: Golden brown color, crispy surface, and it lifts away from the iron without resistance.
Step 17: Remove Carefully Use a fork or silicone-tipped tongs to gently lift the waffle from the iron. Never use metal utensils on non-stick surfaces.
Removal Technique: Slide your fork under one corner and lift gently. The waffle should come away in one piece.
Step 18: Keep Warm or Serve Immediately Place finished vegan waffles on a wire rack to maintain crispiness, or serve immediately. If making multiple waffles, keep them warm in a 200°F oven.
Crispiness Secret: Wire racks prevent steam from making the bottom soggy. Plates trap moisture and create soft waffles.
Step 19: Repeat Process Re-grease the iron lightly between each waffle. Pour batter and repeat the cooking process. Subsequent waffles may cook 30 seconds faster as the iron gets fully heated.
Step 20: Final Quality Check Your perfect vegan waffles should be golden brown outside, fluffy inside, with distinct square pockets for holding syrup. Each waffle should sound slightly hollow when tapped.
Chef’s Notes for Better Vegan Waffles
• Consistency Check: The ideal vegan waffle batter should coat a spoon but still drip off easily – like thick cream.
• Temperature Mastery: Keep your waffle iron consistently hot between batches. Inconsistent heat creates unevenly cooked vegan waffles.
• Timing is Everything: Fresh vegan waffles straight from the iron have the best texture contrast – crispy outside, fluffy inside.
• Batch Cooking: Double this recipe and freeze extras. Frozen vegan waffles reheat beautifully in the toaster for busy mornings.
Nutrition Information (Per Serving)
- Calories: 285
- Protein: 6g
- Carbohydrates: 42g
- Fat: 11g
- Fiber: 2g
- Sugar: 8g
Creative Vegan Waffle Variations
Double Chocolate Vegan Waffles
Replace 1/4 cup flour with cocoa powder and add 1/2 cup mini chocolate chips. These decadent vegan waffles satisfy any chocolate craving.
Berry Burst Vegan Waffles
Gently fold 3/4 cup fresh blueberries into the finished batter. The berries burst during cooking, creating natural fruit pockets.
Protein-Packed Vegan Waffles
Substitute 1/4 cup flour with vanilla protein powder and add 2 extra tablespoons non-dairy milk. Perfect post-workout vegan waffles.
Autumn Spice Vegan Waffles
Add 1/2 cup finely diced apple, 1 extra teaspoon cinnamon, and 1/4 teaspoon nutmeg. Serve with warm maple syrup. For more seasonal plant-based recipes, try our vegan zucchini bread.
Storage & Reheating Your Vegan Waffles
Refrigerator Storage: Store leftover vegan waffles in airtight containers for up to 4 days. Layer wax paper between waffles to prevent sticking.
Freezer Storage: Wrap individual vegan waffles in plastic wrap, then place in freezer bags for up to 3 months. Label with date and contents.
Reheating Methods:
- Toaster: 2-3 minutes on medium setting (best method)
- Oven: 350°F for 5-7 minutes on wire rack
- Air Fryer: 350°F for 2-3 minutes
Never Microwave: Microwaving makes vegan waffles soggy and eliminates their signature crispiness.
Troubleshooting Common Vegan Waffle Problems
Problem: Vegan waffles stick to the iron Solution: Your iron isn’t hot enough, or you need more oil. Wait for proper preheating and grease generously before each waffle.
Problem: Dense, heavy vegan waffles Solution: You overmixed the batter or measured flour incorrectly. Spoon flour into measuring cups – don’t pack it down.
Problem: Pale, soft vegan waffles Solution: Increase cooking time by 1-2 minutes or raise your iron’s temperature setting. Look for golden brown color.
Problem: Batter too thick to pour Solution: Add non-dairy milk 1 tablespoon at a time until batter flows easily but isn’t watery.
Problem: Vegan waffles fall apart when removing Solution: They’re undercooked inside. Wait until steam completely stops before opening the iron, then cook 30 seconds longer.
Essential Equipment for Making Vegan Waffles
- Waffle iron (Belgian or classic style work equally well)
- Large mixing bowls (2 bowls minimum)
- Wire whisk for dry ingredients
- Wooden spoon for gentle mixing
- Measuring cups and spoons (dry and liquid)
- Wire cooling rack for maintaining crispiness
- Cooking spray or pastry brush for greasing
Budget Alternative: No waffle iron? This batter makes excellent pancakes – cook 2-3 minutes per side on a greased griddle.
Shopping List for Vegan Waffles
Pantry Staples
- All-purpose flour (2-pound bag)
- Baking powder (small container)
- Granulated sugar
- Salt
- Ground cinnamon
- Pure vanilla extract
- Vegetable oil
Refrigerated Section
- Non-dairy milk – oat or almond work best
- Apple cider vinegar
Optional Toppings
- Pure maple syrup
- Fresh berries
- Powdered sugar
- Vegan butter spread
Expert Success Secrets for Perfect Vegan Waffles
1. Master the Rest: Let your mixed batter rest for 2-3 minutes before cooking. This creates fluffier vegan waffles by allowing complete flour hydration.
2. Temperature Precision: A properly heated waffle iron should make water droplets dance and evaporate within 2-3 seconds. This ensures crispy exteriors.
3. Steam Watching: Never open the iron early. When steam stops escaping, your vegan waffles are perfectly cooked inside and out.
4. Warm Service Strategy: Keep finished vegan waffles warm in a 200°F oven on wire racks when serving multiple people.
5. Batter Consistency Check: Perfect vegan waffle batter should coat a wooden spoon but still drip off in ribbons – adjust liquid accordingly.
These foolproof vegan waffles will become your go-to weekend breakfast recipe. The detailed instructions ensure success even for complete beginners, while the crispy-fluffy texture rivals any restaurant version. Pair them with our flavorful vegan tacos for an unforgettable brunch spread that proves plant-based cooking is both delicious and satisfying. Master this basic vegan waffle recipe, and you’ll have endless possibilities for creative variations!