- Ready in just 45 minutes with minimal prep work
- Uses pantry staples and whatever fresh veggies you have on hand
- Perfect make-ahead meal that freezes beautifully
- Each serving packs 10g of plant protein and 8g of fiber
Why This Vegetable Soup Recipe Works Every Time
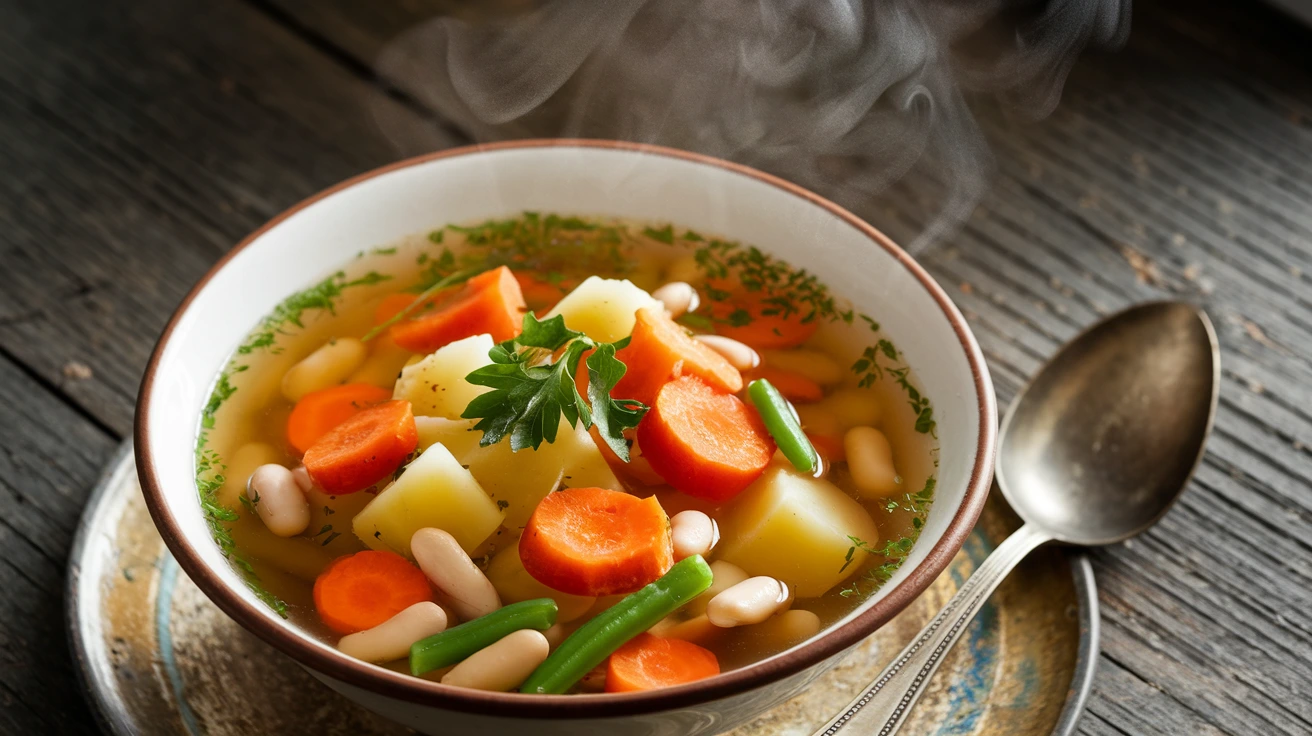
Ever opened your fridge, stared at the random veggies, and wondered what to make? This vegetable soup recipe turns those odds and ends into something magical. I’ve tested countless versions to create this foolproof method that delivers rich flavor without hours of simmering.
The key to amazing vegetable soup lies in building layers of taste from the start. We begin by sautéing aromatics, then add hearty vegetables, herbs, and broth. The result? A nourishing pot of comfort that feeds four hungry people and tastes even better the next day.
Nutrition Comparison (Per Serving)
| Nutrient | Amount | % Daily Value |
|---|---|---|
| Calories | 245 | 12% |
| Protein | 10g | 20% |
| Carbohydrates | 38g | 13% |
| Fiber | 8g | 32% |
| Fat | 6g | 9% |
| Sodium | 580mg | 24% |
| Vitamin A | 12500 IU | 250% |
| Vitamin C | 45mg | 75% |
| Iron | 3.5mg | 19% |
| Calcium | 150mg | 15% |
Time Breakdown
- Prep Time: 15 minutes
- Cook Time: 30 minutes
- Total Time: 45 minutes
Ingredients
| Ingredient | Amount | Notes |
|---|---|---|
| Olive oil | 2 tablespoons | Extra virgin preferred |
| Onion | 1 large | Yellow or white |
| Carrots | 3 medium | Peeled |
| Celery | 2 stalks | Leaves removed |
| Garlic | 3 cloves | Fresh, not jarred |
| Potatoes | 2 medium | Yukon gold or russet |
| Green beans | 1 cup | Fresh or frozen |
| Zucchini | 1 medium | Or yellow squash |
| Cabbage | 2 cups chopped | Green or savoy |
| Diced tomatoes | 1 can (14.5 oz) | With juice |
| Vegetable broth | 6 cups | Low-sodium |
| White beans | 1 can (15 oz) | Cannellini or navy |
| Bay leaves | 2 whole | Remove before serving |
| Dried thyme | 1 teaspoon | |
| Dried oregano | 1 teaspoon | |
| Salt | To taste | Start with ½ teaspoon |
| Black pepper | To taste | Fresh ground best |
| Fresh parsley | 2 tablespoons | For garnish |
Equipment Needed
| Tool | Purpose |
|---|---|
| Large pot or Dutch oven (6-qt) | Cooking vessel |
| Sharp chef’s knife | Vegetable prep |
| Cutting board | Chopping surface |
| Measuring cups & spoons | Accurate measurements |
| Wooden spoon | Stirring without scratching pot |
| Can opener | Opening canned ingredients |
| Ladle | Serving soup |
| Storage containers | Leftovers |
Step-by-Step Instructions
1. Preparation Phase (15 minutes)
- Clear your counter space and set up your cutting board on a stable surface
- Wash your hands thoroughly with soap and warm water for 20 seconds
- Prepare each vegetable in this order:
- Onion: Cut off both ends, peel outer skin. Cut in half from top to bottom, place flat side down, and cut into ¼-inch pieces
- Carrots: Rinse under cold water, scrub if needed. Peel skin with vegetable peeler. Cut off ends, then slice into ¼-inch rounds
- Celery: Cut off leafy tops and bottom end. Rinse under water. Slice into ¼-inch pieces
- Garlic: Separate clove from head. Place flat side of knife on clove and press firmly to crush. Peel skin off. Mince into tiny pieces
- Potatoes: Scrub thoroughly under water. (Peeling optional) Cut into ½-inch cubes
- Green beans: Rinse under water. Snap or cut off stem ends. Cut into 1-inch pieces
- Zucchini: Rinse under water. Cut off ends. Slice in half lengthwise, then cut into ½-inch half-moons
- Cabbage: Remove outer leaves if wilted. Cut in half, cut out hard core. Chop into 1-inch pieces
- Open cans and prepare:
- Place can on counter, secure with one hand
- Position can opener on edge and twist until fully open
- For beans: Pour into colander, rinse under cool water for 30 seconds
- Measure all herbs and spices into small bowls
2. Building Flavor Base (10 minutes)
- Place pot on stove and turn heat to medium
- Add olive oil and wait 30-60 seconds until it shimmers slightly
- Add diced onions to pot, spreading in even layer
- Cook for 3-4 minutes, stirring occasionally with wooden spoon
- Look for translucent appearance but not browning
- If onions start to brown, lower heat slightly
- Add carrots and celery
- Cook for 5 minutes, stirring every minute or so
- Vegetables should soften slightly but retain some firmness
- You’ll notice they become slightly darker and more vibrant
- Add minced garlic
- Stir constantly for 1 minute
- Watch carefully—garlic burns easily and becomes bitter
- You’ll smell the wonderful garlic aroma as it cooks
3. Building the Soup (5 minutes)
- Add prepared potatoes, green beans, and zucchini all at once
- Pour in gently to avoid hot oil splashing
- Add diced tomatoes with their juice
- Pour entire contents of can
- Use wooden spoon to scrape can to get all tomato pieces
- Pour in vegetable broth
- Add slowly while stirring to combine everything
- Add seasonings:
- Drop in bay leaves
- Sprinkle in dried thyme and oregano
- Add ½ teaspoon salt and ¼ teaspoon pepper to start
- Increase heat to high and bring to boil
- Watch for rapid bubbles across the surface
- Once boiling, reduce heat to medium-low
- You want a gentle simmer (small bubbles)
4. Simmering Phase (25-30 minutes)
- Add chopped cabbage
- Stir gently to incorporate
- Maintain gentle simmer:
- Check every 5 minutes
- You should see small, gentle bubbles
- Adjust heat as needed
- Simmer uncovered for 20 minutes
- Stir occasionally to prevent sticking
- Test potato and carrot pieces with fork—they should be tender but hold shape
- Add white beans
- Pour in drained, rinsed beans
- Stir gently to avoid crushing beans
- Cook for 5 more minutes
- Final seasoning:
- Turn off heat
- Taste soup (careful, it’s hot!)
- Add more salt and pepper if needed, ¼ teaspoon at a time
- Remove bay leaves:
- Count as you remove to ensure you find them all
- Use wooden spoon to search if needed
5. Serving & Finishing (5 minutes)
- Let soup sit for 5 minutes before serving
- This helps flavors meld and soup cool to safe eating temperature
- Ladle soup into bowls
- Aim for even distribution of broth and vegetables
- Garnish with chopped fresh parsley
- Serve immediately while hot
For a heartier meal, try serving this alongside a potato soup for a soup-focused dinner party that will impress your guests.

Troubleshooting Common Problems
Problem: Vegetables are too hard or crunchy
- Cause: Not enough cooking time or pieces cut too large
- Solution: Continue simmering until vegetables are tender
- Prevention: Cut vegetables into consistent, smaller pieces
Problem: Soup tastes bland
- Cause: Insufficient seasoning or not layering flavors
- Solution: Add salt gradually (¼ teaspoon at a time), add a splash of lemon juice or vinegar
- Prevention: Season in stages—when sautéing vegetables and again at the end
Problem: Broth is too thin
- Cause: Not enough vegetables or starch
- Solution: Mash some of the potatoes or beans against side of pot to thicken
- Prevention: Include starchy vegetables like potatoes or add beans earlier
Problem: Soup is too thick
- Cause: Too much evaporation or too many starchy vegetables
- Solution: Add more broth or water, ½ cup at a time
- Prevention: Keep an eye on liquid level during cooking
Variations & Substitutions
Seasonal Adaptations
- Spring: Add fresh peas, asparagus, and leeks
- Summer: Use corn, fresh tomatoes, and bell peppers
- Fall: Add butternut squash, kale, and apple
- Winter: Try parsnips, turnips, and more cabbage
Protein Options
- Add 1 cup of cooked chickpeas instead of white beans
- Stir in 1 cup of cooked lentils
- Add 1 cup of cooked quinoa or barley for extra protein
Flavor Profiles
- Italian: Add 1 teaspoon Italian seasoning and finish with grated Parmesan
- Asian-inspired: Add 1 tablespoon ginger, swap some broth for coconut milk
- Spicy: Add ¼-½ teaspoon red pepper flakes or hot sauce
If you’re looking for creamy alternatives, my broccoli cheese soup makes a great companion recipe to add variety to your weekly menu.
Storage & Reheating Guide
Refrigerator Storage
- Cool properly: Let soup cool to room temperature (no more than 2 hours)
- Store safely: Transfer to airtight containers
- Duration: Keeps for up to 5 days
- Container fill: Leave ½-inch space at top for expansion
Freezer Storage
- Portion size: Freeze in individual or family-sized portions
- Containers: Use freezer-safe containers or heavy-duty freezer bags
- Duration: Maintains quality for up to 3 months
- Labeling: Mark with date and contents
Reheating Instructions
- From refrigerator:
- Stovetop: Pour in saucepan, heat over medium-low, stirring occasionally
- Microwave: Heat in 1-minute intervals, stirring between
- From frozen:
- Thaw overnight in refrigerator (safest method)
- Or thaw in microwave using defrost setting before reheating
- Heat until steaming hot (165°F)
If you’re interested in making this part of a healthy eating plan, check out my guide to incorporating soups into a balanced soup diet for sustainable results.
Safety Notes & Tips
Food Safety
- Always wash hands before and after handling food
- Rinse all produce thoroughly under cold running water
- Keep raw and ready-to-eat foods separate
- Refrigerate leftover soup within 2 hours
- Reheat leftovers to 165°F before eating
Kitchen Safety
- Handle knife safely—cut away from body
- Use pot holders when handling hot pot
- Keep pot handle turned inward on stove
- Be careful of steam when removing lid
- Let soup cool slightly before blending (if desired)
Pro Tips
- Flavor boost: Save Parmesan rinds to drop in while simmering
- Herb freshness: Add hearty herbs (thyme, rosemary) early, delicate herbs (parsley, basil) at the end
- Chopping hack: Keep a damp paper towel under cutting board to prevent slipping
- Texture variety: Cut vegetables in different shapes for visual appeal
- Taste as you go: Sample broth (carefully!) during cooking to adjust seasoning
Dietary Information
- Vegetarian ✓
- Vegan ✓
- Gluten-free ✓
- Low-fat ✓
- High-fiber ✓
This recipe serves 4 people with generous portions, approximately 1½ cups per serving. For larger appetites or to have leftovers, simply double all ingredients and use a larger pot.