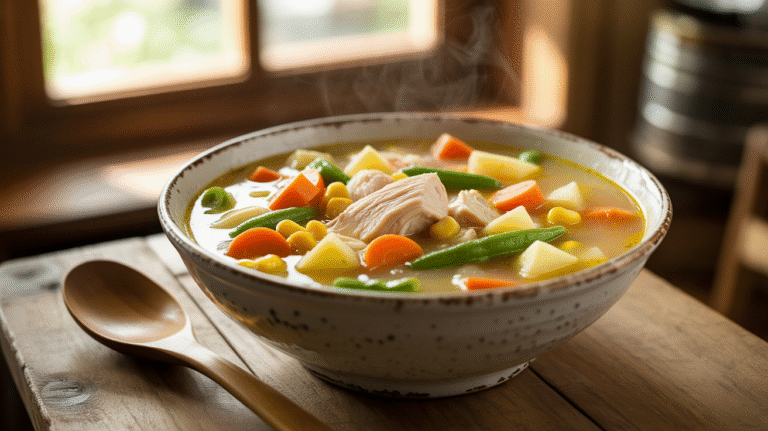
This creamy roasted cauliflower soup delivers restaurant-quality comfort in your own kitchen. By roasting the cauliflower first, we unlock deep, caramelized flavors that transform this simple vegetable into an incredibly rich and satisfying soup. This creamy roasted cauliflower soup recipe is perfect for cozy dinners and impresses every time.
SERVES: 4 | PREP: 20 MIN | COOK: 45 MIN | TOTAL: 65 MIN
Ingredients
Vegetables
| Ingredient | Amount |
|---|---|
| Large cauliflower head | 1 (about 2 lbs) |
| Yellow onion | 1 medium, diced |
| Garlic cloves | 4, minced |
| Celery stalks | 2, chopped |
Liquids & Dairy
| Ingredient | Amount |
|---|---|
| Vegetable broth | 4 cups |
| Heavy cream | ½ cup |
| Whole milk | ¼ cup |
Seasonings & Herbs
| Ingredient | Amount |
|---|---|
| Olive oil | 3 tablespoons |
| Fresh thyme | 2 teaspoons |
| Salt | 1 teaspoon (or to taste) |
| Black pepper | ½ teaspoon |
| Bay leaves | 2 |
| Butter | 2 tablespoons |
Step-by-Step Instructions for Creamy Roasted Cauliflower Soup
Phase 1: Preparing and Roasting the Cauliflower (30 minutes)
1. Preheat Your Oven Properly Set your oven to 425°F (220°C) and let it fully preheat for at least 15 minutes. This high temperature is crucial for creating those golden, caramelized edges that give this creamy roasted cauliflower soup its signature deep flavor. Place one oven rack in the center position for even heat distribution.
2. Prepare the Cauliflower Like a Pro Remove all green leaves from the cauliflower head and trim the stem end, but don’t discard the core completely. Turn the cauliflower upside down on your cutting board. Using a sharp chef’s knife, cut the cauliflower into uniform florets about 1 to 1½ inches in size. Keeping pieces similar in size ensures even cooking. Cut the core into small ½-inch pieces – it adds wonderful flavor to your soup.
3. Season and Oil the Cauliflower Place all cauliflower pieces on a large rimmed baking sheet. Drizzle with 2 tablespoons of olive oil and sprinkle with ½ teaspoon of salt. Using your hands (clean hands work best), toss everything together until each piece is evenly coated with oil and salt. The oil helps create those crispy, caramelized edges we’re after.
4. Arrange for Perfect Roasting Spread the cauliflower in a single layer across the baking sheet. Don’t overcrowd – if pieces are touching too much, they’ll steam instead of roast. Use two baking sheets if necessary. Leave space between florets for air circulation.
5. Roast to Golden Perfection Place the baking sheet in your preheated oven and roast for 25-30 minutes. Don’t open the oven door for the first 20 minutes – this maintains consistent temperature. The cauliflower is ready when the edges are golden brown and florets are easily pierced with a fork. Some pieces should have dark, caramelized spots – these are flavor treasures!
Phase 2: Building Your Soup Base (12 minutes)
6. Heat Your Fat Properly In a large, heavy-bottomed pot or Dutch oven, heat 1 tablespoon olive oil and 2 tablespoons butter over medium heat. The combination of oil and butter gives rich flavor while preventing the butter from burning. You’ll know it’s ready when the butter stops foaming and starts to smell nutty.
7. Sauté the Aromatics Foundation Add your diced onion and chopped celery to the hot fat. Stir immediately to coat with the oil mixture. Cook for 5-6 minutes, stirring occasionally with a wooden spoon. The vegetables should become translucent and soft, not brown. You’ll hear the sizzling sound gradually diminish as the vegetables release their moisture.
8. Add Garlic and Herbs Carefully Push the cooked onion and celery to one side of the pot. Add minced garlic and fresh thyme to the cleared space. This prevents the garlic from burning. Stir for 30-45 seconds until fragrant – you should smell the garlic immediately. If it starts to brown, reduce heat. Burnt garlic will make your entire soup bitter.
Phase 3: Combining and Simmering (18 minutes)
9. Add Roasted Cauliflower with All the Good Bits Carefully transfer all roasted cauliflower to the pot, including any browned bits stuck to the baking sheet. Use a spatula to scrape up those caramelized pieces – they’re pure concentrated flavor. Stir everything together to combine the roasted cauliflower with the sautéed vegetables.
10. Add Liquid and Seasonings Pour in 4 cups of vegetable broth slowly to avoid splashing. Add 2 bay leaves and the remaining ½ teaspoon salt and ½ teaspoon black pepper. The liquid should just cover the vegetables. If it doesn’t, add a bit more broth or water.
11. Bring to a Proper Simmer Increase heat to medium-high and bring the mixture to a rolling boil – you’ll see large bubbles breaking the surface. Once boiling, immediately reduce heat to medium-low to maintain a gentle simmer. You should see small bubbles occasionally breaking the surface, not a vigorous boil.
12. Simmer Until Tender Cover the pot and simmer for 15-18 minutes. The cauliflower should be very tender when pierced with a fork – it should practically fall apart. If pieces are still firm, continue cooking for 2-3 more minutes. Taste the broth and adjust seasoning if needed.
Phase 4: Blending Your Creamy Roasted Cauliflower Soup (8 minutes)
13. Cool Slightly for Safety Remove the pot from heat and let it cool for 3-5 minutes. Remove and discard the bay leaves – they’ve done their job of adding subtle flavor. Hot soup can be dangerous to blend, so this cooling step is important for your safety.
14. Blend to Silky Smoothness Using an immersion blender directly in the pot, blend the soup until completely smooth, about 2-3 minutes. Move the blender around to catch all pieces. If using a regular blender, work in batches, filling the blender only halfway each time. Blend each batch for 60-90 seconds until silky smooth. Hot liquids expand, so never fill the blender completely.
15. Check Texture and Strain if Desired Your soup should be completely smooth with no lumps. For restaurant-quality texture, strain through a fine-mesh sieve, pressing solids with the back of a spoon. This step is optional but creates an ultra-silky creamy roasted cauliflower soup.
Phase 5: Finishing with Dairy (5 minutes)
16. Return to Heat Gently Return the blended soup to the pot over low heat. Never use high heat once you add dairy, as it can cause curdling. Heat just until you see the soup begin to steam slightly around the edges.
17. Add Dairy Gradually Remove the pot from heat temporarily. Slowly stir in ½ cup heavy cream and ¼ cup whole milk. Stir constantly as you add to prevent separation. The cream adds richness while the milk prevents the soup from being too heavy.
18. Final Seasoning and Serving Return to low heat for 2-3 minutes to warm through. Taste and adjust seasoning with salt and pepper as needed. The soup should coat the back of a spoon when ready. Serve immediately in warmed bowls.
Professional Tips for Perfect Creamy Roasted Cauliflower Soup
Roasting Creates the Magic: The difference between ordinary and extraordinary creamy roasted cauliflower soup lies in that crucial roasting step. Those golden, caramelized edges develop complex nutty flavors impossible to achieve through simple boiling or steaming.
Temperature Control is Everything: Never boil your soup once dairy is added. Keep heat at medium-low or lower to prevent curdling and maintain that silky smooth texture that makes this creamy roasted cauliflower soup so luxurious.
Blend Thoroughly for Best Results: Take your time during the blending process. Well-blended soup should be completely smooth without any fibrous bits. This attention to detail separates good soup from restaurant-quality results.
Season in Layers: Salt the cauliflower before roasting, season the vegetable base while cooking, and adjust final seasoning after blending. This layered approach ensures your creamy roasted cauliflower soup has depth and complexity in every spoonful.
Nutrition Information (Per Serving)
- Calories: 185
- Protein: 6g
- Carbohydrates: 12g
- Fat: 14g
- Fiber: 4g
- Sodium: 780mg
Creative Variations of Creamy Roasted Cauliflower Soup
Curry-Spiced Cauliflower Soup: Transform your creamy roasted cauliflower soup by adding 1 tablespoon curry powder and ½ teaspoon ground ginger with the garlic. The warming spices create an entirely different flavor profile, similar to the aromatic spices found in this curry soup with chickpeas and potatoes.
Cheesy Cauliflower Soup: Elevate your basic recipe by stirring in 1 cup of shredded sharp cheddar cheese during the final simmering stage. The cheese melts perfectly into the creamy base, creating an indulgent variation.
Herb-Crusted Version: Top your finished soup with crispy breadcrumbs mixed with fresh parsley, chives, and a drizzle of olive oil. The textural contrast adds restaurant-style presentation to your homemade creation.
Broccoli-Cauliflower Blend: Replace half the cauliflower with broccoli florets for a colorful twist on the classic recipe. If you prefer pure broccoli flavor, try this creamy caramelized broccoli soup for comparison.
Storage & Reheating Your Creamy Roasted Cauliflower Soup
Refrigerator Storage: Allow your creamy roasted cauliflower soup to cool completely before transferring to airtight containers. Store in the refrigerator for up to 4 days. The soup will naturally thicken as it cools, which is perfectly normal.
Freezing Guidelines: This soup freezes well for up to 3 months, though dairy-based soups may separate slightly when thawed. Label containers with the date and contents for easy identification.
Proper Reheating Technique: Warm your creamy roasted cauliflower soup gently over medium-low heat, stirring frequently to prevent sticking. Add small amounts of broth or milk if the soup has thickened too much during storage. Never boil dairy-based soups during reheating as this can cause separation.

Common Problems and Solutions
Problem: Soup is too thin and watery Solution: Simmer your creamy roasted cauliflower soup uncovered for 5-10 minutes to reduce excess liquid. Alternatively, blend in 1-2 tablespoons of instant mashed potato flakes to thicken naturally.
Problem: Soup tastes bland or lacks flavor Solution: Roasted vegetables need generous seasoning. Add salt gradually, then brighten with a squeeze of fresh lemon juice or a splash of white wine vinegar to enhance the overall flavor profile.
Problem: Soup looks curdled or separated Solution: This usually happens when dairy gets too hot. Remove from heat immediately and whisk vigorously. If separation persists, blend briefly with an immersion blender to re-emulsify.
Problem: Soup is too thick and paste-like Solution: Thin your creamy roasted cauliflower soup with warm vegetable broth or milk, adding ¼ cup at a time while stirring until you reach the desired consistency.
Problem: Bitter or off-taste in finished soup Solution: Usually caused by burnt garlic or over-roasted cauliflower. Balance the bitterness by adding a pinch of sugar or stirring in extra cream to mellow harsh flavors.
Essential Equipment for Success
- Large rimmed baking sheet (at least 18×13 inches) for proper cauliflower roasting
- Heavy-bottomed pot or Dutch oven (4-6 quart capacity) for even heat distribution
- Immersion blender or regular blender for achieving smooth, creamy texture
- Fine-mesh strainer (optional, for ultra-smooth restaurant-quality texture)
- Sharp chef’s knife for efficient and safe vegetable preparation
- Wooden spoon for stirring without scratching cookware
- Measuring cups and spoons for accurate ingredient proportions
Organized Shopping List
Produce Section
- 1 large cauliflower head (approximately 2 pounds)
- 1 medium yellow onion
- 1 head fresh garlic
- 2 celery stalks
- Fresh thyme sprigs
Dairy Section
- Heavy cream (need ½ cup)
- Whole milk (need ¼ cup)
- Butter (need 2 tablespoons)
Pantry and Dry Goods
- Vegetable broth (32 oz carton)
- Extra virgin olive oil
- Kosher salt and black pepper
- Dried bay leaves
Five Success Secrets for Perfect Results
1. Master the Roasting Technique: The secret to exceptional creamy roasted cauliflower soup lies in achieving proper caramelization. Don’t rush this step – those golden edges create the nutty, complex flavors that separate great soup from ordinary.
2. Control Your Heat Throughout: Use medium heat for sautéing vegetables, maintain a gentle simmer during cooking, and keep heat low after adding dairy. Temperature control prevents burning, overcooking, and curdling.
3. Season Strategically in Stages: Salt the cauliflower before roasting, season vegetables while sautéing, and make final adjustments after blending. This layered seasoning approach ensures your creamy roasted cauliflower soup has balanced flavor throughout.
4. Blend with Patience and Precision: Take time to achieve completely smooth texture. Proper blending technique – moving the immersion blender around and blending for adequate time – creates the luxurious mouthfeel that makes this soup special.
5. Taste and Adjust Fearlessly: Don’t be afraid to adjust seasoning multiple times throughout the cooking process. Great cooks taste constantly and make adjustments. Your creamy roasted cauliflower soup should be well-seasoned and balanced in every spoonful.