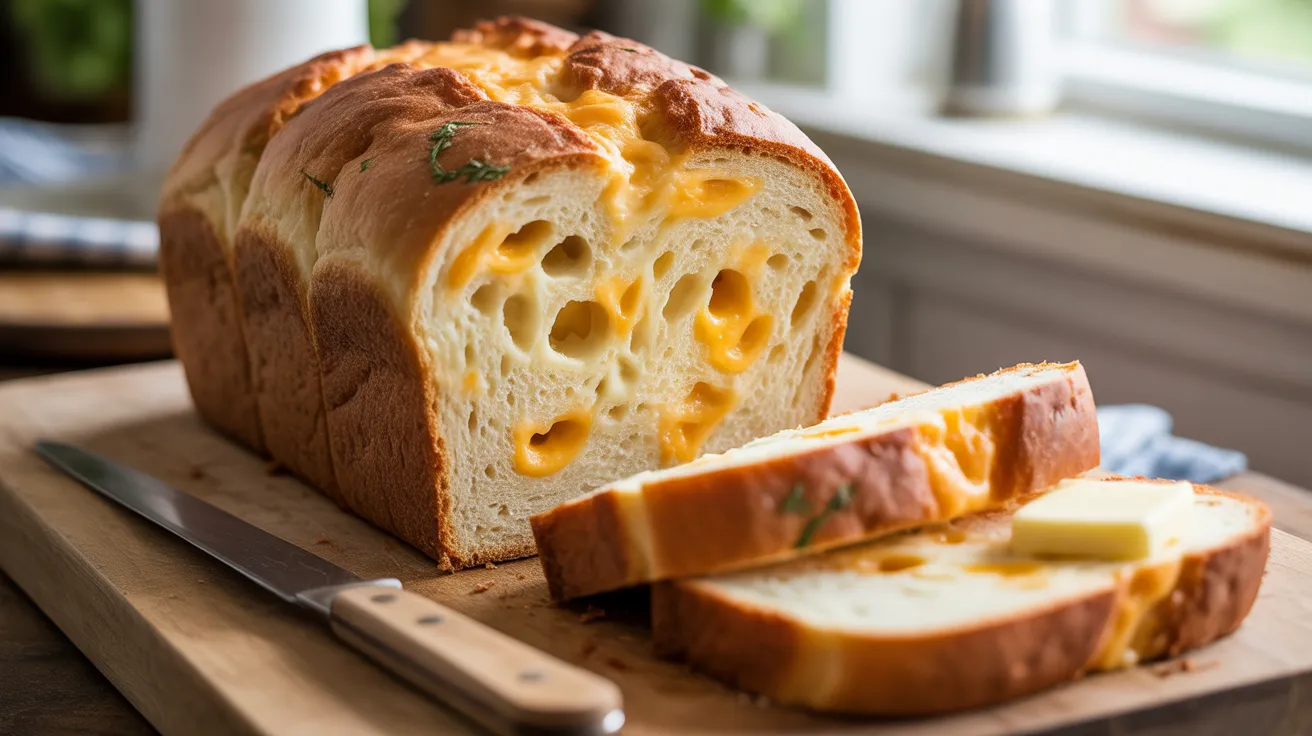
There’s something magical about pulling a golden loaf of bread machine cheese bread from your machine, with melted cheese pockets throughout every slice. This simple recipe turns your bread machine into a cheese-loving baker’s best friend, creating a savory loaf that’s perfect for sandwiches, toast, or eating warm with butter. Making bread machine cheese bread at home means you control the cheese blend and get bakery-quality results without kneading a single minute.
SERVES: 4 | PREP: 10 MIN | COOK: 3 HR | TOTAL: 3 HR 10 MIN
Ingredients
Wet Ingredients
| Ingredient | Measurement |
|---|---|
| Warm water (80-90°F) | 1 cup |
| Melted butter | 2 tablespoons |
| Egg | 1 large |
Dry Ingredients
| Ingredient | Measurement |
|---|---|
| Bread flour | 3 cups |
| Granulated sugar | 2 tablespoons |
| Salt | 1½ teaspoons |
| Instant yeast | 2¼ teaspoons |
Cheese & Mix-ins
| Ingredient | Measurement |
|---|---|
| Shredded sharp cheddar cheese | 1 cup |
| Shredded mozzarella cheese | ½ cup |
| Garlic powder | 1 teaspoon |
| Dried parsley | 1 teaspoon |
Step-by-Step Instructions
Phase 1: Preparing Your Ingredients (5 minutes)
Step 1: Check your water temperature using a kitchen thermometer. The water should read between 80-90°F. Too hot (over 110°F) kills the yeast, while too cold (under 70°F) won’t activate it properly. This temperature range feels slightly warm to your wrist, like comfortable bathwater.
Step 2: Melt the butter in your microwave for 15-20 seconds until completely liquid but not bubbling hot. Let it cool for 1 minute before using. Hot butter can create temperature pockets that interfere with yeast activation.
Step 3: Crack your egg into a small bowl and beat it lightly with a fork for 10 seconds. This ensures even distribution throughout the dough and prevents egg white clumps in your finished bread.
Step 4: Shred your cheeses if you bought blocks (freshly shredded melts better than pre-shredded). Toss the cheddar and mozzarella together in a bowl. Room temperature cheese incorporates more evenly than cold cheese straight from the fridge.
Phase 2: Loading Your Bread Machine (5 minutes)
Step 5: Add the warm water to your bread machine pan first. Liquid ingredients go in first for most bread machine models, creating a buffer that prevents the yeast from activating too early. Check your machine’s manual if you’re unsure about ingredient order.
Step 6: Pour in the melted butter and beaten egg, distributing them evenly across the water surface. This creates layers that help ingredients mix properly once the machine starts.
Step 7: Add the bread flour next, pouring it gently to create an even layer that covers the wet ingredients completely. Use a spatula to level the flour if needed. This flour barrier keeps the yeast separate from liquids until mixing begins.
Step 8: Sprinkle the sugar, salt, garlic powder, and dried parsley evenly across the flour surface. Keep the salt away from where you’ll add yeast, as direct salt contact can inhibit yeast performance. The sugar feeds the yeast during rising.
Step 9: Make a small well in the center of the flour using your finger, creating a shallow crater about 1 inch wide. Pour the instant yeast into this well. This protects the yeast from touching wet ingredients or salt before mixing starts.
Step 10: Add ¾ cup of the mixed cheeses on top of the flour around the yeast well. Reserve the remaining ¼ cup for later. You’ll add this reserved cheese during the mix-in cycle or after the first rise, depending on your machine’s capabilities.
Phase 3: Machine Settings & Monitoring (3 hours)
Step 11: Close the bread machine lid and select the Basic/White Bread setting with a Medium crust color. Set the loaf size to 1.5 lb or 2 lb depending on your machine’s options. The total cycle takes approximately 3 hours from start to finish.
Step 12: Listen for the mix-in beep (usually occurs 20-30 minutes into the cycle after the first knead). If your machine has this feature, lift the lid quickly and sprinkle in the reserved ¼ cup of cheese. Close the lid immediately to maintain temperature. If your machine lacks a mix-in beep, add this cheese during the first 5 minutes of kneading instead.
Step 13: Check the dough consistency after 10 minutes of mixing. Open the lid briefly and observe the dough ball. It should look smooth and slightly tacky, pulling away from the pan sides cleanly. If it’s too sticky and clinging to the sides, add 1 tablespoon of flour. If it’s too dry and crumbly, add 1 teaspoon of water.
Step 14: Let the machine complete its cycle without opening the lid again. The machine will knead, rise, punch down, rise again, and bake automatically. You’ll notice the aroma of cheese and bread filling your kitchen during the final 40 minutes of baking.
Phase 4: Finishing & Cooling (15 minutes)
Step 15: When the machine beeps to signal completion, put on oven mitts immediately. The pan will be extremely hot (350°F+). Remove the pan from the machine using both hands for stability.
Step 16: Let the bread rest in the pan for 5 minutes. This brief cooling period allows the structure to set slightly, making removal easier and preventing the loaf from collapsing. The steam continues cooking the center during this rest.
Step 17: Turn the pan upside down over a wire cooling rack and gently shake to release the loaf. If it sticks, slide a plastic spatula around the edges to loosen it. Never use metal utensils, as they scratch the non-stick coating. The bread should slide out easily with gentle tapping.
Step 18: Remove the kneading paddle from the bottom of the loaf if it came out with the bread (this happens sometimes). Use a plastic utensil or clean fingers to wiggle it free while the bread is still warm. Once the bread cools completely, the paddle becomes much harder to remove.
Step 19: Let the bread cool on the rack for at least 30 minutes before slicing. Cutting into hot bread releases too much steam, creating a gummy texture inside. The cooling process allows the crumb structure to finish setting properly.
Step 20: Slice your bread machine cheese bread using a serrated knife with a gentle sawing motion. Cut slices ½-inch thick for sandwiches or ¾-inch thick for toast. The cheese pockets throughout make each slice satisfyingly savory.
Chef’s Notes
Cheese Selection Matters: Sharp cheddar provides bold flavor while mozzarella adds stretch and moisture. This combination creates the perfect texture balance. Feel free to experiment with aged cheddar for more intense flavor or add ¼ cup parmesan for a sharper bite.
Flour Type Is Critical: Always use bread flour, not all-purpose flour. Bread flour contains 12-14% protein compared to all-purpose’s 10-12%, creating better gluten structure and a taller, less dense loaf. This protein content is especially important when adding heavy cheese.
Yeast Freshness Check: If you’re unsure about your yeast’s potency, test it first. Mix 1 teaspoon yeast with ¼ cup warm water and 1 teaspoon sugar. It should foam vigorously within 5-10 minutes. Dead yeast means flat, dense bread.
Altitude Adjustments: If you live above 3,000 feet elevation, reduce yeast by ¼ teaspoon and increase liquid by 1-2 tablespoons. Lower air pressure affects rising times and moisture evaporation, making these adjustments necessary for consistent results.
Nutrition Information (Per Serving)
Calories: 385 | Protein: 16g | Carbohydrates: 52g | Fat: 12g | Fiber: 2g | Sodium: 620mg | Calcium: 215mg
Delicious Variations
Jalapeño Popper Bread: Add ¼ cup diced pickled jalapeños (drained and patted dry) with the cheese mix-in. Replace half the cheddar with cream cheese cubes for that authentic jalapeño popper flavor. This variation pairs perfectly with chili or soup, much like how our bread machine brioche complements sweeter breakfast dishes.
Italian Herb & Cheese: Swap mozzarella for ½ cup shredded provolone and add 1 tablespoon Italian seasoning plus 2 tablespoons grated parmesan. Include ½ teaspoon crushed red pepper flakes for subtle heat. This creates a bread reminiscent of garlic knots.
Three-Cheese Everything: Use ⅓ cup each of sharp cheddar, gruyere, and fontina cheeses. Add 2 tablespoons everything bagel seasoning on top before baking starts. The combination creates a sophisticated, deli-style bread perfect for paninis.
Bacon Cheddar Ranch: Mix in ¼ cup cooked, crumbled bacon and 1 tablespoon ranch seasoning mix with the dry ingredients. Use all sharp cheddar for the cheese component. This variation makes incredible grilled cheese sandwiches and works wonderfully for breakfast toast, similar to how our bread machine English muffin bread serves as a versatile breakfast base.
Storage & Reheating
Store your cooled bread in an airtight container or resealable bag at room temperature for up to 3 days. The cheese content makes this bread slightly more perishable than plain bread, so refrigerate it if your kitchen runs warm (above 75°F).
For longer storage, slice the bread and freeze individual slices with parchment paper between each slice. This method lets you grab single servings without thawing the entire loaf. Frozen slices stay fresh for up to 3 months.
Reheat refrigerated slices in your toaster on the medium setting for 2-3 minutes until warmed through and slightly crispy. For frozen slices, toast on the medium-high setting for 3-4 minutes, checking halfway through. The cheese remelts beautifully during toasting.
Microwave reheating works for quick warming. Wrap a slice in a damp paper towel and microwave for 15-20 seconds. The damp towel prevents the bread from drying out, though the texture won’t be as crisp as toasting provides.
Troubleshooting Common Problems
Dense, Heavy Loaf: This usually means your yeast was expired or the water temperature was wrong. Check yeast freshness with the foam test described in Chef’s Notes. Measure water temperature carefully—even 5-10 degrees makes a difference. Dense texture can also result from measuring flour incorrectly. Spoon flour into measuring cups instead of scooping, which packs in too much.
Cheese Burned on Pan Bottom: Your machine’s heating element runs too hot, or cheese fell directly on the pan during mixing. Next time, add cheese later in the mixing cycle rather than at the start. You can also brush the pan with butter before adding ingredients to create a protective layer that prevents cheese from sticking and burning.
Loaf Collapsed After Rising: Opening the lid too many times during rising releases heat and causes collapse. Check dough only once during mixing phase, then leave the machine alone. Collapsed loaves also happen from too much liquid—make sure you’re using level measurements for water, not rounded cups.
Uneven Cheese Distribution: The cheese clumped together instead of spreading throughout. Make sure you’re shredding cheese finely and tossing it with a bit of flour before adding (use 1 tablespoon flour per cup of cheese). This coating prevents cheese from clumping. Add cheese in two stages rather than all at once for more even distribution.
Loaf Stuck in Pan: Let the bread rest longer before attempting removal—5-10 minutes in the pan after baking helps. If it still sticks, run the pan under hot water for 30 seconds to loosen the non-stick coating. Check that your pan’s coating isn’t damaged. A worn non-stick surface causes chronic sticking issues and may need replacement.
Equipment Essentials

- Bread machine (1.5 or 2 lb capacity)
- Kitchen thermometer (for checking water temperature)
- Liquid measuring cup (1 cup capacity)
- Dry measuring cups (nested set)
- Measuring spoons
- Box grater or food processor (for shredding cheese)
- Small mixing bowls (2-3 bowls)
- Wire cooling rack
- Serrated bread knife
- Oven mitts
- Rubber spatula (for leveling flour)
Shopping List by Store Section
Dairy Section
- Butter (buy 1 stick, need 2 tablespoons)
- Sharp cheddar cheese (buy 8 oz block)
- Mozzarella cheese (buy 4 oz block or bag)
- Eggs (buy 1 dozen, need 1 egg)
Baking Aisle
- Bread flour (buy 5 lb bag)
- Granulated sugar
- Instant yeast (check expiration date)
- Salt (if needed)
Spice Aisle
- Garlic powder
- Dried parsley
Note: Check your pantry before shopping—you may already have sugar, salt, garlic powder, and parsley.
5 Success Secrets
1. Room Temperature Cheese Works Better: Take cheese out of the fridge 20-30 minutes before making bread. Cold cheese creates temperature pockets in your dough that can slow yeast activity and create uneven rising. Room temperature cheese also shreds more easily and incorporates more smoothly into the dough.
2. Don’t Skip the Rest Period: That 5-minute rest after baking isn’t optional. The bread’s internal temperature is still 190-200°F when the machine beeps. This rest time lets the structure stabilize, preventing collapse and making slicing cleaner. Rushing this step often results in a squished loaf.
3. Measure Flour Correctly: Use the spoon-and-level method for flour. Spoon flour into your measuring cup until overflowing, then level off with a knife. Scooping flour directly packs in 25% more flour than recipes intend, resulting in dry, dense bread. This single measurement technique makes the biggest difference in bread machine success.
4. Check Your Machine’s Pan: Look for scratches or damaged non-stick coating before starting. A compromised pan causes sticking issues and affects heat distribution. If you notice damage, replace the pan. Most manufacturers sell replacement pans separately, and investing in a new pan saves countless frustrating batches.
5. Time Your Baking Strategically: Plan so your bread finishes 1-2 hours before serving. Fresh bread needs cooling time, but serving it slightly warm (about 90°F) gives you the best cheese flavor and texture. Completely cooled bread tastes good, but that just-warm temperature creates an irresistible eating experience where the cheese is still soft and aromatic.