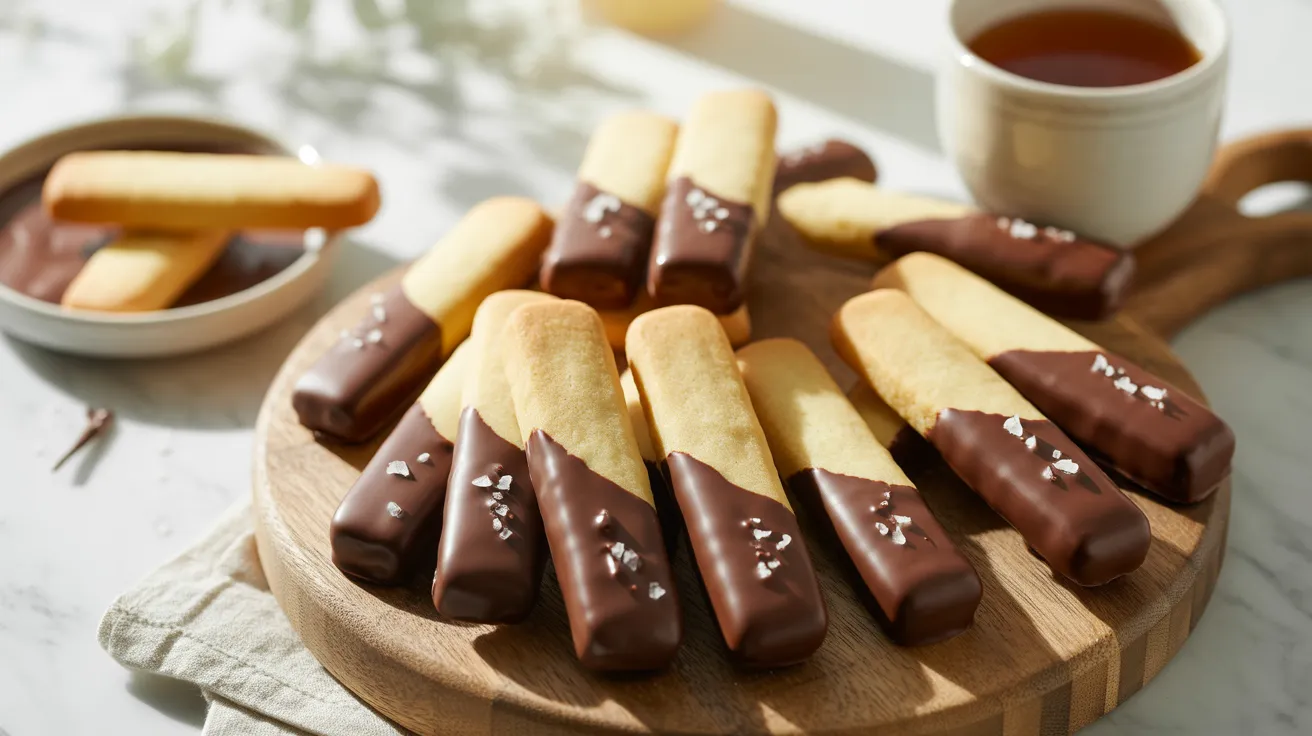
These buttery chocolate-dipped shortbread cookies combine crisp, tender biscuits with silky chocolate coating. Perfect for gift-giving or afternoon tea, this chocolate-dipped shortbread recipe delivers bakery-quality results with just a handful of simple ingredients you probably already have in your kitchen.
SERVES: 4 | PREP: 20 MIN | COOK: 18 MIN | TOTAL: 38 MIN (plus 30 min chilling)
Ingredients
For the Shortbread Base
| Ingredient | Amount |
|---|---|
| Unsalted butter, softened | 1 cup (2 sticks) |
| Granulated sugar | ½ cup |
| Pure vanilla extract | 2 teaspoons |
| All-purpose flour | 2 cups |
| Cornstarch | ¼ cup |
| Salt | ¼ teaspoon |
For the Chocolate Coating
| Ingredient | Amount |
|---|---|
| Semi-sweet chocolate chips | 1½ cups |
| Coconut oil | 1 tablespoon |
| Flaky sea salt (optional) | pinch |
Step-by-Step Instructions
Phase 1: Preparing the Dough (8 minutes)
Step 1: Take your softened butter out of the fridge 30 minutes before you start baking. It should feel like room-temperature cream cheese when you press it with your finger. This temperature is crucial because cold butter won’t cream properly, and melted butter will make greasy cookies instead of tender ones.
Step 2: Beat the butter and sugar together in a large mixing bowl using an electric mixer on medium speed for 3-4 minutes. You’re looking for a pale, fluffy texture that’s almost doubled in volume. Scrape down the sides of the bowl halfway through to catch any butter hiding on the edges.
Step 3: Add the vanilla extract and mix for another 30 seconds until completely combined. The vanilla should smell fragrant and be evenly distributed throughout the butter mixture with no streaks visible.
Step 4: In a separate bowl, whisk together the flour, cornstarch, and salt. The cornstarch is your secret weapon here—it makes the shortbread extra tender and gives it that signature melt-in-your-mouth texture that separates amateur cookies from bakery-quality treats.
Step 5: Add the flour mixture to the butter mixture in three additions, mixing on low speed after each addition just until no dry flour remains visible. Stop mixing as soon as the dough comes together. Overmixing develops gluten, which makes tough, chewy cookies instead of the delicate, crisp texture we want for chocolate-dipped shortbread.
Phase 2: Shaping and Chilling (12 minutes active, 30 minutes passive)
Step 6: Turn the dough out onto a clean work surface. Knead it gently 3-4 times just to bring it together into a cohesive mass. The dough should feel slightly crumbly but hold together when squeezed.
Step 7: Shape the dough into a 6-inch square that’s about 1 inch thick. Use a ruler if you have one—this ensures even baking and uniform cookies. Press firmly to compact the dough so it doesn’t crumble when you cut it.
Step 8: Wrap the dough square tightly in plastic wrap or parchment paper. Refrigerate for 30 minutes minimum or up to 3 days. This chilling step is non-negotiable because cold dough holds its shape during baking and prevents the cookies from spreading into flat puddles.
Step 9: After chilling, unwrap the dough and place it on a cutting board. Use a sharp chef’s knife to cut the square into 16 rectangular fingers, each about 3 inches long and ¾ inch wide. Wipe your knife clean between cuts for neat edges that look professional.
Phase 3: Baking (18 minutes)
Step 10: Preheat your oven to 325°F (160°C). Line a baking sheet with parchment paper or a silicone baking mat. Don’t skip the liner—shortbread contains so much butter that cookies will stick without it.
Step 11: Arrange the shortbread fingers on the prepared baking sheet with 1 inch of space between each cookie. They won’t spread much, but you need airflow around each piece for even browning.
Step 12: Bake for 16-18 minutes until the edges are just barely turning golden brown and the centers look set but still pale. The cookies should not brown on top—that’s a sign of overbaking. They’ll feel soft when you touch them but will firm up as they cool.
Step 13: Let the cookies cool on the baking sheet for 5 minutes without moving them. They’re extremely fragile when hot and will break if you try to transfer them too soon.
Step 14: Transfer the cookies to a wire cooling rack using a thin metal spatula. Slide the spatula completely under each cookie to support it fully. Cool completely for 30 minutes before dipping—warm cookies will melt the chocolate coating.
Phase 4: Chocolate Coating (10 minutes)
Step 15: Combine the chocolate chips and coconut oil in a microwave-safe bowl. Microwave in 20-second bursts, stirring between each interval, until the chocolate is 90% melted. This usually takes 60-80 seconds total. Let the residual heat melt the remaining chunks as you stir.
Step 16: Dip each cooled shortbread cookie halfway into the melted chocolate, holding one end at a slight angle. Let the excess chocolate drip back into the bowl for 3-5 seconds. You want a clean line where the chocolate meets the bare cookie, not drips running down the sides.
Step 17: Place each dipped cookie back on the parchment-lined baking sheet. If you’re using flaky sea salt, sprinkle 2-3 flakes on the chocolate coating within 10 seconds of dipping, before the chocolate sets. The salt adds a sophisticated sweet-salty contrast that elevates these cookies from good to extraordinary.
Step 18: Refrigerate the chocolate-dipped shortbread for 15 minutes or let them sit at room temperature for 45 minutes until the chocolate is completely set and no longer glossy. The chocolate should snap cleanly when you bite into it.
Chef’s Notes
Temperature Control: Room-temperature butter is essential for proper creaming. If you forgot to soften your butter, cut it into small cubes and let it sit for 15 minutes—don’t microwave it or you’ll end up with partially melted butter that ruins the texture.
Chocolate Quality: Use good-quality chocolate chips or chopped chocolate bars for the coating. The better the chocolate, the better your chocolate-dipped shortbread will taste. I love Ghirardelli or Guittard brands for reliable results.
Make-Ahead Magic: You can freeze unbaked dough for up to 3 months. Slice while frozen and add 2 minutes to the baking time. The baked cookies also freeze beautifully for 2 months before or after dipping.
Precision Matters: Use a kitchen scale if you have one. 1 cup of flour should weigh 120 grams. Scooping flour directly from the bag packs it down and can add 20-30 grams extra per cup, making dry, crumbly cookies.
Nutrition Information (Per Serving – 4 cookies)
| Nutrient | Amount |
|---|---|
| Calories | 485 |
| Total Fat | 32g |
| Saturated Fat | 20g |
| Cholesterol | 61mg |
| Sodium | 95mg |
| Total Carbohydrates | 48g |
| Dietary Fiber | 2g |
| Sugars | 24g |
| Protein | 4g |
Creative Variations
Peppermint Chocolate Variation: Add ½ teaspoon peppermint extract to the dough along with the vanilla. Crush 3 candy canes and sprinkle the pieces over the wet chocolate coating. This creates a festive twist perfect for holiday cookie exchanges, similar to these peppermint shortbread cookies that are always a hit.
Dark Chocolate Orange: Replace the vanilla with 1 tablespoon orange zest in the dough. Use dark chocolate (70% cacao) for dipping instead of semi-sweet. The citrus brightens the rich chocolate and creates a sophisticated flavor profile.
White Chocolate Cranberry: Dip cookies in white chocolate instead of dark. Immediately press 3-4 dried cranberries into the wet chocolate coating. For more cranberry inspiration, try these cranberry orange shortbread cookies that feature similar flavor combinations.
Espresso Chocolate: Add 2 tablespoons instant espresso powder to the flour mixture. Dip in dark chocolate and dust with cocoa powder before the chocolate sets. Coffee amplifies chocolate flavor and adds complexity.
Storage & Reheating
Room Temperature: Store chocolate-dipped shortbread in an airtight container with parchment paper between layers for up to 1 week. Keep them in a cool, dry place away from direct sunlight—heat will melt the chocolate coating.
Refrigeration: These cookies keep for 2 weeks in the fridge in an airtight container. Let them come to room temperature for 10 minutes before serving so the shortbread softens slightly and the chocolate isn’t tooth-crackingly hard.
Freezing: Freeze undipped or dipped cookies for up to 3 months. Wrap individually in plastic wrap, then place in a freezer bag. Thaw at room temperature for 30 minutes. The texture remains perfectly crisp.
Make-Ahead Strategy: Bake the shortbread up to 3 days ahead and store in an airtight container. Dip in chocolate the day you plan to serve or gift them for the freshest appearance and snap.
Troubleshooting Common Problems
Problem 1: Cookies spread too much during baking Your butter was too warm or you didn’t chill the dough long enough. Refrigerate the shaped dough for a full 30 minutes minimum. If your kitchen is very warm (above 75°F), chill for 45 minutes instead.
Problem 2: Shortbread is too crumbly and falls apart You either undermixed the dough or your butter wasn’t soft enough during creaming. The dough should hold together when squeezed. If it’s already baked and crumbly, you can’t fix it, but for next time, make sure to cream the butter and sugar until fluffy.
Problem 3: Chocolate coating is too thick or lumpy The chocolate was overheated or didn’t have enough coconut oil to thin it. Reheat gently and stir in another ½ tablespoon coconut oil. Never let chocolate exceed 115°F or it will seize and become grainy.
Problem 4: Cookies are too hard instead of tender Overbaking is the culprit. Shortbread should barely color at the edges and remain pale on top. They firm up considerably as they cool, so they should feel soft when you remove them from the oven. Set a timer and check at 16 minutes.
Problem 5: Chocolate won’t stick to cookies or looks streaky The cookies were still warm when dipped. They must be completely cool to room temperature. Warm cookies create condensation that prevents chocolate from adhering smoothly. Wait the full 30 minutes cooling time.
Equipment Essentials

- Electric hand mixer or stand mixer (for creaming butter)
- Large mixing bowl and medium mixing bowl
- Measuring cups and measuring spoons
- Whisk (for dry ingredients)
- Rolling pin or bench scraper (for shaping dough)
- Sharp chef’s knife and cutting board
- Baking sheet (half-sheet pan works perfectly)
- Parchment paper or silicone baking mat
- Wire cooling rack
- Microwave-safe bowl (for melting chocolate)
- Rubber spatula (for stirring chocolate)
- Thin metal spatula (for transferring cookies)
Shopping List
Dairy Section
- Unsalted butter (2 sticks)
Baking Aisle
- All-purpose flour
- Granulated sugar
- Cornstarch
- Pure vanilla extract
- Semi-sweet chocolate chips
- Coconut oil
Spices & Seasonings
- Salt
- Flaky sea salt (optional, for garnish)
Success Secrets
1. Temperature is Everything: Keep your butter at 65-68°F for perfect creaming. Too cold and it won’t incorporate air; too warm and your cookies will spread. Press your finger into the butter—it should leave an indent without your finger sliding through.
2. The Cornstarch Trick: Don’t skip the cornstarch in this chocolate-dipped shortbread recipe. This ingredient creates that signature sandy, tender texture by diluting the gluten-forming proteins in flour. It’s what separates good shortbread from great shortbread.
3. Chocolate Coating Technique: Hold cookies at a 45-degree angle when dipping for the cleanest chocolate line. Dip quickly in one smooth motion—hesitation causes drips and uneven coating. Tap the cookie gently on the bowl edge to remove excess.
4. Baking Sheet Position: Place your baking sheet on the center rack of the oven for even heat distribution. Rotate the pan 180 degrees at the halfway point (9 minutes) if your oven has hot spots.
5. Visual Cues Over Time: Every oven is different. Look for barely golden edges and a matte surface on top of the cookies rather than trusting the timer completely. Your chocolate-dipped shortbread should never brown on top—pale equals perfect.
These buttery, chocolate-dipped shortbread cookies deliver that perfect contrast between crisp cookie and smooth chocolate coating. The recipe yields 16 cookies (4 per person), but I always make a double batch because they disappear fast at any gathering!