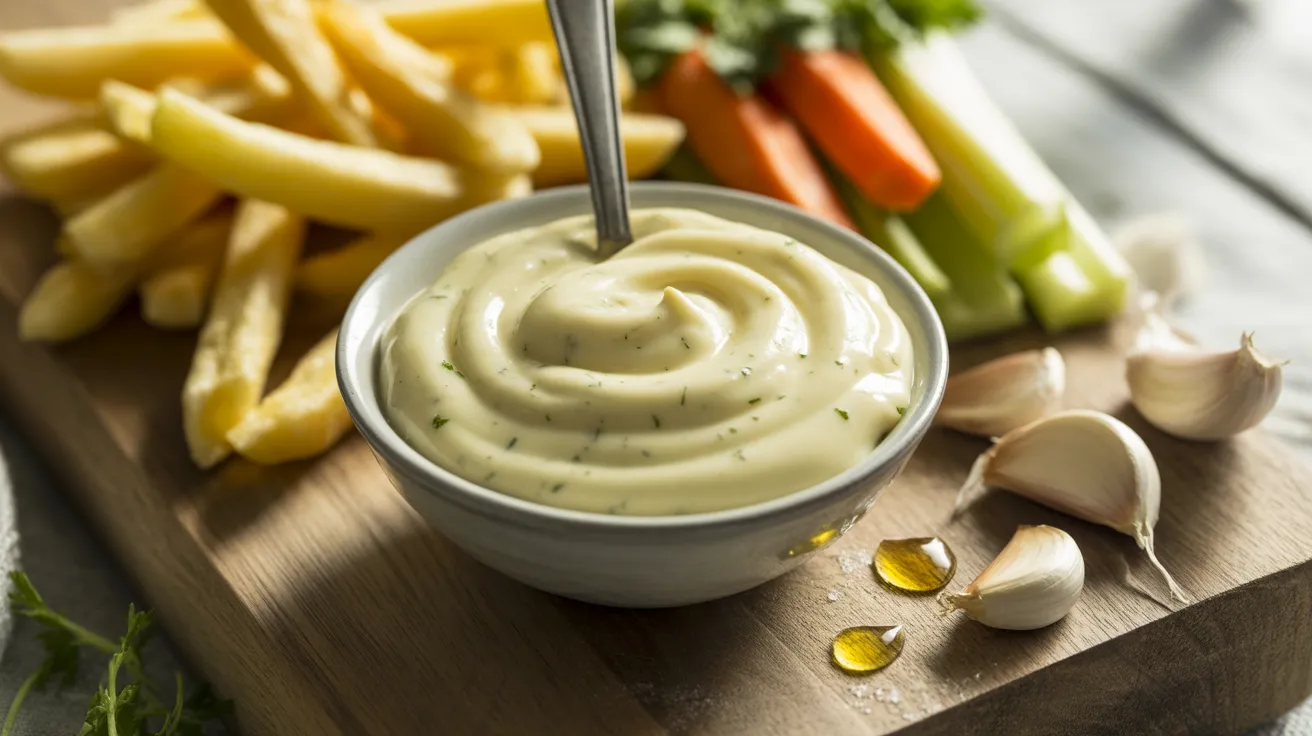
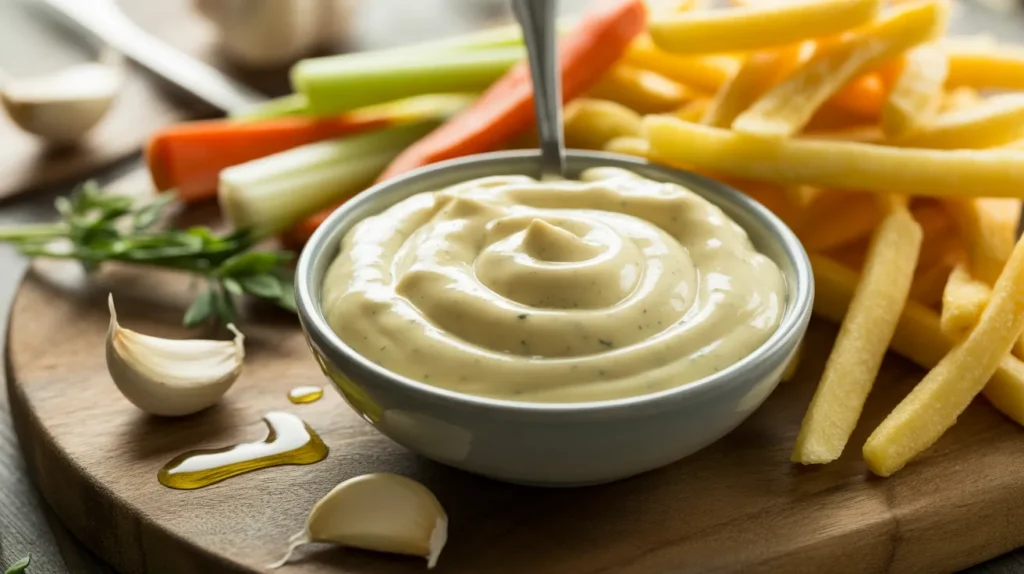
Making garlic aioli at home transforms your cooking game with minimal effort. This authentic garlic aioli delivers that rich, creamy texture and bold garlic punch you crave, perfect for dipping fries, spreading on sandwiches, or elevating your favorite dishes. Once you taste this homemade version, you’ll never go back to jarred mayo.
SERVES: 4 | PREP: 10 MIN | COOK: 0 MIN | TOTAL: 10 MIN
Ingredients
Base Ingredients
| Ingredient | Measurement |
|---|---|
| Egg yolks (room temperature) | 2 large |
| Garlic cloves (minced) | 4-5 cloves |
| Fresh lemon juice | 2 tablespoons |
| Dijon mustard | 1 teaspoon |
| Salt | ½ teaspoon |
Oil & Finishing
| Ingredient | Measurement |
|---|---|
| Neutral oil (vegetable or canola) | ¾ cup |
| Extra virgin olive oil | ¼ cup |
| White pepper | ¼ teaspoon |
Step-by-Step Instructions
Phase 1: Preparing Your Base (Minutes 0-3)
Step 1: Place your egg yolks in a medium mixing bowl and let them sit at room temperature for 10-15 minutes before starting. Cold eggs won’t emulsify properly, and you’ll end up with a broken sauce that separates into oily puddles.
Step 2: Mince your garlic cloves extremely fine—almost to a paste. I run my knife through them at least 15 times. Chunky garlic creates an uneven texture and leaves you with surprise garlic bombs in your aioli.
Step 3: Add the lemon juice, Dijon mustard, and salt to your egg yolks. Whisk these together for 30 seconds until the mixture turns slightly pale and frothy. This creates the foundation that holds everything together.
Phase 2: Creating the Emulsion (Minutes 3-8)
Step 4: Combine your neutral oil and olive oil in a measuring cup with a spout. This makes pouring much easier and gives you better control during the critical emulsification stage.
Step 5: Start whisking your egg mixture vigorously in a circular motion. Keep your bowl steady—I usually place a damp towel underneath to prevent it from spinning around.
Step 6: While whisking constantly, add your oil one drop at a time for the first 2 tablespoons. Yes, literally drops. This feels painfully slow, but it’s absolutely essential. The emulsion needs to form gradually or it breaks.
Step 7: Once you see the mixture start to thicken and turn creamy (after about 2 tablespoons of oil), you can increase to a thin, steady stream instead of drops. Your arm will thank you.
Step 8: Continue whisking and drizzling oil for 3-4 minutes until all the oil is incorporated. The garlic aioli should be thick enough to hold soft peaks when you lift the whisk.
Phase 3: Flavoring and Finishing (Minutes 8-10)
Step 9: Add your minced garlic to the emulsified base. Whisk it in thoroughly for 30 seconds. The garlic flavor will mellow slightly as it sits, so don’t worry if it tastes strong initially.
Step 10: Taste your aioli and adjust the seasoning. I usually add another pinch of salt and a squeeze of lemon juice at this point. The acidity should balance the richness of the oil.
Step 11: Whisk in the white pepper for a subtle warmth that doesn’t overpower the garlic. Black pepper works too, but it creates visible specks that some people don’t love.
Step 12: Transfer your finished garlic aioli to an airtight container. It should coat the back of a spoon and slowly drip off rather than running quickly.
Chef’s Notes
Temperature Matters: Room temperature ingredients emulsify significantly better than cold ones. I leave my eggs on the counter for 20 minutes before starting, which makes a noticeable difference in how smoothly the garlic aioli comes together.
Oil Selection Strategy: The 75/25 ratio of neutral to olive oil gives you richness without overwhelming bitterness. Pure olive oil can make aioli taste harsh and throat-catching, especially with raw garlic in the mix.
Garlic Intensity Control: Raw garlic grows stronger over time. If you’re making this ahead, use 3 cloves instead of 5, or your aioli will taste aggressive by day two.
Hand Whisking vs. Tools: While you can use an immersion blender, hand whisking gives you better control over the emulsion and produces a lighter, fluffier texture that commercial versions can’t match.
Nutrition Information (Per Serving)
Calories: 385 | Protein: 2g | Carbs: 2g | Fat: 43g | Saturated Fat: 6g | Cholesterol: 93mg | Sodium: 185mg
Creative Variations
Spicy Chipotle Aioli
Add 1 tablespoon of finely chopped chipotle peppers in adobo sauce along with the garlic. This creates a smoky heat that’s incredible on burgers and grilled chicken. The technique stays exactly the same.
Herb Garden Aioli
Whisk in 2 tablespoons of finely minced fresh herbs (basil, parsley, chives) after the emulsion forms. This bright, fresh version pairs beautifully with vegetables and seafood, similar to how aioli sauce transforms simple fries into something memorable.
Lemon Herb Aioli
Double the lemon juice to 4 tablespoons and add 1 teaspoon of lemon zest along with 1 tablespoon of fresh dill. This lighter version works perfectly with fish and makes an excellent sandwich spread.
Roasted Garlic Aioli
Replace raw garlic with 6 cloves of roasted garlic mashed into a paste. The flavor becomes sweet and mellow rather than sharp, creating a completely different profile that’s delicious on roasted vegetables. You can use similar techniques from making Caesar dressing to balance the flavors.
Storage & Reheating
Store your garlic aioli in an airtight container in the refrigerator for up to 5 days. The raw egg yolks mean this isn’t a long-term keeper, but it rarely lasts that long anyway.
Press plastic wrap directly onto the surface before sealing the container. This prevents a skin from forming and keeps the aioli fresh-tasting.
Bring the aioli to room temperature 15 minutes before serving. Cold aioli is too thick and doesn’t spread properly. Just let it sit on the counter while you prep everything else.
Don’t freeze aioli—it breaks the emulsion completely. You’ll end up with separated oil and watery egg when it thaws, and there’s no fixing it.
If your stored aioli looks slightly separated with a thin layer of oil on top, just give it a quick whisk. This usually brings it right back together.
Troubleshooting Common Problems
Problem 1: Aioli Won’t Thicken
Solution: Your egg yolks were too cold, or you added oil too quickly at the start. Place 1 fresh egg yolk in a clean bowl. Whisk it for 30 seconds, then add your broken aioli very slowly while whisking constantly. This almost always rescues the emulsion.
Problem 2: Aioli Tastes Too Bitter
Solution: You used too much olive oil or a harsh, peppery variety. Whisk in 2-3 tablespoons of neutral oil to dilute the bitterness. You can also add ½ teaspoon of honey to balance the flavors without making it sweet.
Problem 3: Garlic Flavor Too Intense
Solution: The garlic continues developing strength as it sits. Whisk in 2 tablespoons of sour cream or Greek yogurt to mellow the bite. This also makes the aioli lighter and tangier.
Problem 4: Aioli Separated Into Oil and Liquid
Solution: The emulsion broke because you added oil too fast or stopped whisking. Start fresh with 1 egg yolk in a clean bowl, whisk until frothy, then add the broken aioli drop by drop while whisking vigorously. Patience is key here.
Problem 5: Aioli Too Thick and Gluey
Solution: You over-emulsified or used eggs that were too fresh. Thin it out by whisking in 1 tablespoon of warm water or lemon juice at a time until you reach the perfect consistency. The aioli should flow slowly, not hold stiff peaks.
Equipment Essentials
Medium Mixing Bowl – Heavy glass or ceramic works best because it won’t slide around while you’re whisking like crazy. Metal bowls can give the aioli a slightly metallic taste.
Whisk – A balloon whisk with thin wires beats in more air and creates better emulsion than a flat whisk. Your forearm muscles will also develop nicely.
Measuring Cup with Spout – Makes controlled oil pouring possible, especially during the critical drop-by-drop phase. A squeeze bottle works even better if you have one.
Damp Kitchen Towel – Roll it into a ring and set your bowl on top. This stabilizes everything so you can whisk with one hand and pour with the other.
Microplane or Garlic Press – Getting the garlic superfine is crucial for smooth texture. A press works, but I prefer the control of mincing by hand.
Shopping List
Dairy Section
- Eggs (need 2 yolks, buy 1 dozen for safety)
Produce Section
- Fresh garlic (1 head)
- Lemons (1 large)
Condiment/Oil Aisle
- Dijon mustard (small jar)
- Neutral oil (vegetable or canola, 1 bottle)
- Extra virgin olive oil (1 bottle, choose mild-flavored)
Spice Section
- Salt (kosher or sea salt)
- White pepper (small container)
Success Secrets
1. Temperature is everything when making garlic aioli. Room temperature eggs emulsify three times faster and more reliably than cold ones. I set mine out while I prep my other ingredients.
2. The drop-by-drop method during the first 2 tablespoons of oil creates an emulsion strong enough to handle faster pouring later. Skipping this step causes 80% of broken aioli disasters.
3. Whisk in a consistent circular pattern without stopping. Random whisking patterns don’t incorporate oil evenly, creating pockets of unmixed liquid that eventually break the emulsion.
4. Fresh lemon juice brightens the flavors and helps stabilize the emulsion through acidity. Bottled lemon juice lacks the same power and makes the aioli taste flat.
5. Let your finished aioli rest for 10 minutes before tasting and adjusting. The flavors meld together during this time, and you’ll get a much better sense of whether it needs more salt, acid, or garlic.