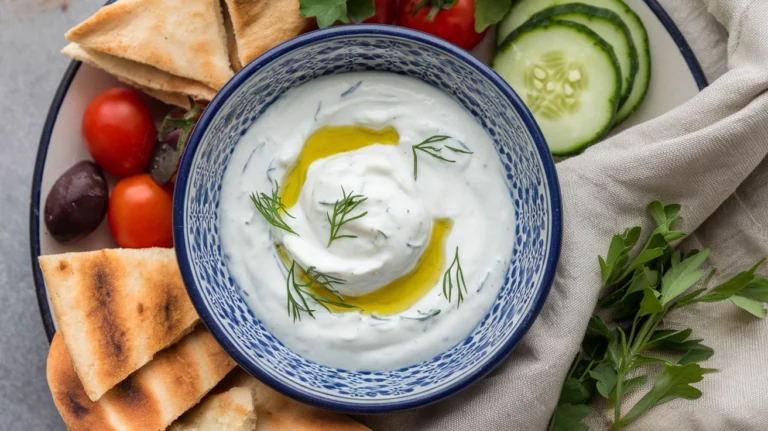
Making authentic Caesar dressing from scratch transforms ordinary salads into restaurant-quality meals. This Caesar dressing recipe delivers bold, garlicky flavor with a creamy texture that clings perfectly to crisp romaine lettuce, and you’ll never want store-bought again once you taste the difference.
SERVES: 4 | PREP: 10 MIN | COOK: 0 MIN | TOTAL: 10 MIN
Why This Caesar Dressing Works
I’ve been making this recipe for years, and it never fails to impress dinner guests.
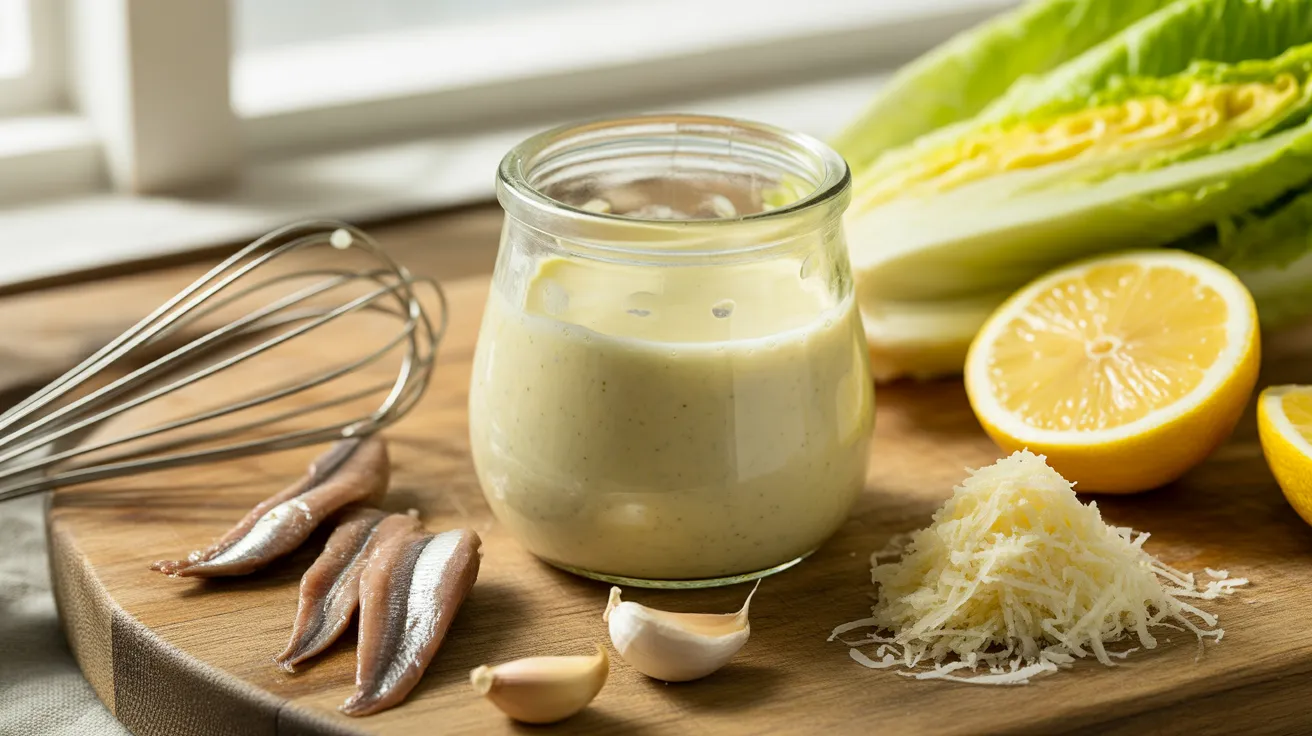
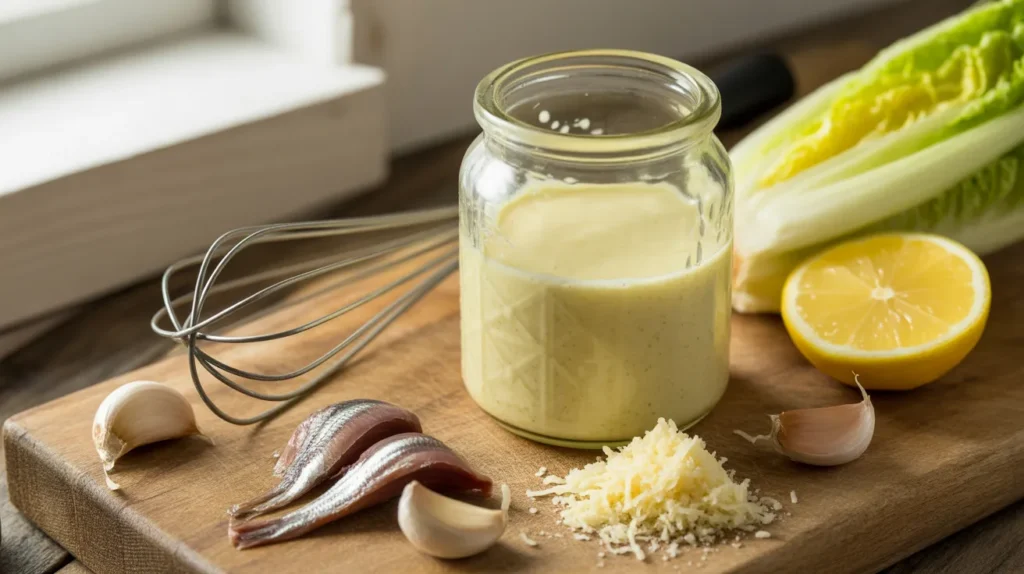
The secret is using real anchovies instead of anchovy paste. They create that signature umami depth that makes Caesar dressing so crave-worthy.
Fresh lemon juice brightens everything up. The acid balances the richness from the egg yolk and oil, creating perfect harmony in every spoonful.
Grating your own Parmesan cheese matters more than you’d think. Pre-grated cheese contains anti-caking agents that prevent smooth emulsification.
Ingredients
Flavor Base
| Ingredient | Amount | Notes |
|---|---|---|
| Garlic cloves | 3 medium | Fresh, not pre-minced |
| Anchovy fillets | 4-5 fillets | Packed in oil, drained |
| Dijon mustard | 1 tablespoon | Acts as emulsifier |
| Fresh lemon juice | 3 tablespoons | About 1 large lemon |
| Worcestershire sauce | 1 teaspoon | For depth |
Creamy Components
| Ingredient | Amount | Notes |
|---|---|---|
| Egg yolk | 1 large | Room temperature |
| Mayonnaise | 2 tablespoons | Backup emulsifier |
| Sour cream | 2 tablespoons | Adds tang |
Oil & Cheese
| Ingredient | Amount | Notes |
|---|---|---|
| Extra virgin olive oil | ½ cup | Light, not robust |
| Vegetable oil | ¼ cup | Mellows olive flavor |
| Parmesan cheese | ½ cup | Freshly grated |
| Black pepper | ½ teaspoon | Freshly ground |
| Kosher salt | ¼ teaspoon | To taste |
Step-by-Step Instructions
Phase 1: Building the Flavor Foundation (3 minutes)
Step 1: Place 3 garlic cloves on your cutting board and smash them with the flat side of your knife.
This bruising releases the garlic oils immediately. You’ll smell the difference compared to just mincing.
Step 2: Sprinkle ¼ teaspoon kosher salt over the smashed garlic.
The salt acts as an abrasive, helping you create a smooth paste instead of chunky bits that’ll overpower your dressing.
Step 3: Use the flat side of your knife to mash the garlic and salt together, dragging it across the board in a scraping motion.
Keep working it for about 30 seconds until you have a creamy paste with no visible chunks. This technique prevents harsh garlic bites.
Step 4: Add 4-5 anchovy fillets to the garlic paste and continue mashing them together.
The anchovies should break down completely into the mixture. If you see whole pieces after 1 minute of mashing, you need to keep going.
Step 5: Transfer your garlic-anchovy paste to a medium mixing bowl.
Scrape every bit off the cutting board with a rubber spatula. This paste is the soul of your dressing.
Phase 2: Creating the Emulsion (4 minutes)
Step 6: Add 1 egg yolk, 1 tablespoon Dijon mustard, 2 tablespoons mayonnaise, and 2 tablespoons sour cream to the bowl with your paste.
The egg yolk is crucial here. It contains lecithin, which bonds oil and water together so your dressing doesn’t separate.
Step 7: Whisk these ingredients together vigorously for 30 seconds until completely smooth and pale yellow.
You’re building the foundation that’ll hold your oil. The mixture should look cohesive with no streaks of egg yolk visible.
Step 8: Pour 3 tablespoons fresh lemon juice and 1 teaspoon Worcestershire sauce into your bowl.
Whisk again for 15 seconds to incorporate completely. The mixture will thin out slightly, and that’s exactly what you want.
Step 9: Combine ½ cup extra virgin olive oil and ¼ cup vegetable oil in a measuring cup with a pour spout.
This oil blend prevents the dressing from tasting too heavy or bitter. Pure olive oil can overwhelm the other flavors.
Step 10: Begin adding the oil in a very thin stream while whisking constantly.
I’m talking pencil-thin here. Pour too fast and the emulsion will break, leaving you with separated, oily dressing. Your arm will get tired, but keep whisking.
Step 11: Watch the mixture closely as you add oil. It should gradually thicken and become glossy.
After you’ve added about half the oil, the dressing will start to look noticeably thicker. This means your emulsion is working properly.
Step 12: Continue adding the remaining oil in a steady stream, still whisking constantly.
The final texture should coat the back of a spoon without sliding off immediately. If it’s too thick, you can thin it later.
Phase 3: Finishing Touches (3 minutes)
Step 13: Add ½ cup freshly grated Parmesan cheese to your emulsified dressing.
Grate it on the finest holes of your grater. The smaller the cheese particles, the smoother your final dressing will be.
Step 14: Whisk the Parmesan in thoroughly, working it for 30-45 seconds.
The cheese adds body and that sharp, nutty flavor that defines a proper Caesar. You’ll notice the dressing thickens slightly as you incorporate it.
Step 15: Add ½ teaspoon freshly ground black pepper and taste your dressing.
Fresh pepper makes a huge difference. The pre-ground stuff loses its essential oils and tastes flat in comparison.
Step 16: Assess the flavor balance and adjust as needed.
Need more salt? Add ⅛ teaspoon at a time. Want more tang? Squeeze in ½ tablespoon lemon juice. Too thick? Whisk in 1 tablespoon water.
Step 17: If your dressing seems too thick to pour, thin it with cold water one tablespoon at a time.
Whisk thoroughly after each addition. The dressing should drizzle off your whisk but still have enough body to cling to lettuce.
Step 18: Transfer your finished Caesar dressing to a jar or airtight container.
Use a rubber spatula to scrape every last bit from the bowl. Cover tightly and refrigerate for at least 30 minutes before serving.
The resting time lets flavors meld together and gives the dressing a chance to thicken slightly as it chills.
Chef’s Notes
The Raw Egg Situation: I use pasteurized eggs when making Caesar dressing to reduce any food safety concerns. You can find them at most grocery stores right next to regular eggs, and they emulsify just as beautifully.
Anchovy Alternatives: If you’re truly opposed to anchovies, try adding 1 extra teaspoon of Worcestershire sauce plus ¼ teaspoon of fish sauce. It won’t be quite as authentic, but you’ll still get that savory depth.
Oil Temperature Matters: Make sure your oil is at room temperature before adding it. Cold oil is harder to emulsify and more likely to break your dressing.
Garlic Intensity Control: Three cloves give you a bold, punchy garlic flavor. If you prefer milder dressing, start with two cloves and taste before adding more.
Nutrition Information (Per Serving)
Calories: 385
Protein: 5g
Carbohydrates: 3g
Fat: 41g
Saturated Fat: 7g
Fiber: 0g
Sugar: 1g
Sodium: 420mg
Creative Variations
Lemon-Herb Caesar: Add 2 tablespoons minced fresh herbs (parsley, chives, or basil) and an extra tablespoon of lemon zest to brighten the traditional recipe. This version pairs beautifully with grilled chicken or shrimp.
Creamy Garlic Caesar: Double the garlic and whisk in 2 tablespoons of garlic aioli for an intensely garlicky version. I use this when making Caesar wraps or as a dip for vegetables.
Lighter Caesar Dressing: Replace half the oil with additional sour cream or Greek yogurt to cut calories. The texture stays creamy, but you lose some of the richness.
Balsamic Caesar Fusion: Swap 1 tablespoon of the lemon juice with balsamic vinaigrette for a sweeter, more complex flavor profile. This works surprisingly well on heartier greens like kale.
Storage & Reheating
Store your Caesar dressing in an airtight glass jar or container in the refrigerator.
It’ll stay fresh for 5-7 days thanks to the lemon juice and salt acting as preservatives. Glass is better than plastic because it won’t absorb the garlic smell.
Always check for any off odors before using leftover dressing. If it smells sour or fishy (beyond the normal anchovy scent), it’s time to toss it.
The dressing will thicken considerably in the fridge. Let it sit at room temperature for 10 minutes before serving, then whisk in 1-2 tablespoons of water to restore the pourable consistency.
Never freeze Caesar dressing. The emulsion will break completely when thawed, leaving you with separated oil and water that can’t be recombined.
If your stored dressing separates slightly in the fridge, just shake the jar vigorously or whisk it back together. A little separation is normal and doesn’t mean it’s gone bad.
Troubleshooting Common Problems
Problem 1: My dressing broke and looks curdled or separated
This happens when you add the oil too quickly or didn’t whisk constantly. Start fresh with a new egg yolk in a clean bowl. Slowly whisk in your broken dressing as if it were oil. The new yolk will re-emulsify everything. Add it in a thin stream while whisking like crazy, and you’ll save the batch.
Problem 2: The dressing tastes too fishy
You probably used too many anchovies or added anchovy paste instead of fillets. Paste is much more concentrated than whole fillets. To fix it, make a half batch without any anchovies, then mix it with your overly fishy batch to dilute the intensity. Next time, stick with 4-5 fillets maximum.
Problem 3: There are chunks of garlic that taste too strong
You didn’t mash the garlic enough in the beginning. Those chunks will bite your mouth with raw intensity. Push the dressing through a fine-mesh strainer to remove the pieces, or blend everything in a food processor for 10 seconds to break them down completely. Prevention is better though—spend more time making that smooth paste.
Problem 4: The dressing is too thick and gloopy
This usually means you added too much cheese or didn’t use enough oil. Whisk in cold water one tablespoon at a time until you reach the right consistency. The dressing should drizzle off your spoon, not plop off in thick globs. Aim for a texture similar to heavy cream.
Problem 5: My dressing tastes flat and boring
Not enough salt, lemon juice, or Worcestershire sauce. These ingredients provide the brightness and depth that make Caesar dressing addictive. Taste carefully and add ½ teaspoon salt, 1 tablespoon lemon juice, or ½ teaspoon Worcestershire as needed. You want bold, punchy flavors, not timid ones.
Equipment Essentials
Mixing bowl (medium-sized, preferably with a rubber bottom so it doesn’t slide around)
Wire whisk (a balloon whisk works best for incorporating air and building the emulsion)
Measuring cups and spoons (accurate measurements matter for emulsification)
Microplane or fine grater (for the Parmesan cheese and garlic paste)
Chef’s knife (for smashing and mincing the garlic cloves)
Cutting board (wooden or plastic works fine)
Rubber spatula (for scraping every bit of dressing from the bowl)
Glass jar with lid (for storing the finished dressing)
Citrus juicer (optional, but it makes getting fresh lemon juice much easier)
Shopping List
Refrigerated Section
- Large eggs (1)
- Mayonnaise
- Sour cream
- Parmesan cheese block (not pre-grated)
Produce Section
- Fresh garlic bulb
- Fresh lemons (1-2)
Pantry/International Aisle
- Anchovy fillets in oil
- Dijon mustard
- Worcestershire sauce
- Extra virgin olive oil
- Vegetable oil
- Kosher salt
- Black peppercorns (if you have a grinder)
Success Secrets
1. Room temperature ingredients emulsify better than cold ones. Take your egg yolk out of the fridge 20 minutes before starting, and you’ll have a much easier time creating a stable emulsion.
2. Fresh Parmesan cheese makes or breaks this recipe. Buy a wedge of real Parmigiano-Reggiano and grate it yourself. The pre-shredded stuff contains cellulose powder that prevents proper mixing.
3. Taste as you go and adjust the seasoning. Every lemon has different acidity, every garlic clove has different intensity. Your palate is the best measuring tool you have.
4. Make this dressing at least 30 minutes before serving. The flavors need time to marry together in the fridge. Fresh dressing tastes sharp and unbalanced compared to one that’s rested.
5. Use a light hand with olive oil. Robust, peppery olive oils can make Caesar dressing taste bitter. Choose a mild, buttery olive oil or blend it with neutral vegetable oil for balance.
This Caesar dressing recipe proves that homemade versions blow away anything you’ll find in a bottle. The fresh ingredients, proper technique, and careful seasoning create restaurant-quality results every single time.
Once you’ve mastered the basic method, you’ll find yourself making this weekly for salads, wraps, and even as a dip. The confidence you’ll gain from emulsifying your own dressing opens doors to countless other recipes that use the same technique.